We needed some small bubble machines at work and checking the usual stage equipment stores turned up nothing suitable. So I dropped into Kmart on my way home and found a $6 machine in just the right form factor.
First test with some half flat AA cells produced a louder than expected stream of bubbles that continued in the face of wind gusts and rapid movements as I tried to find its limits. After 15 minutes and clouds of bubbles I got bored and called it a success.
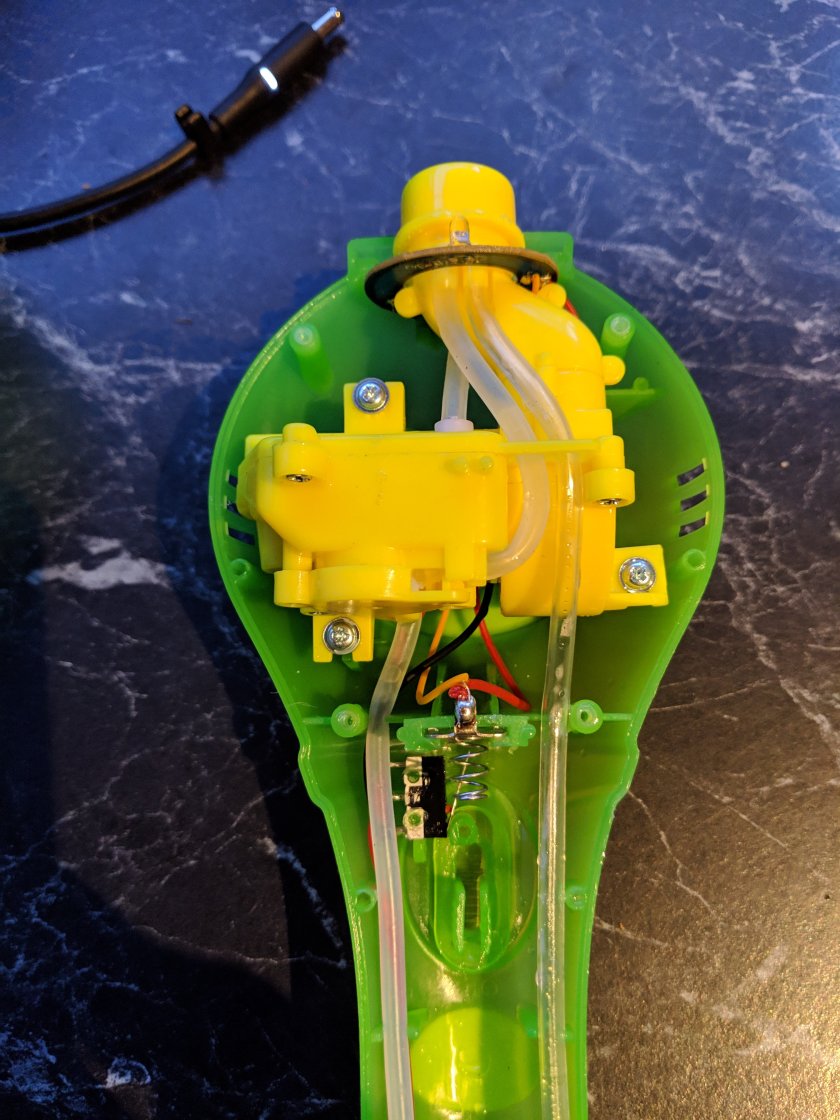
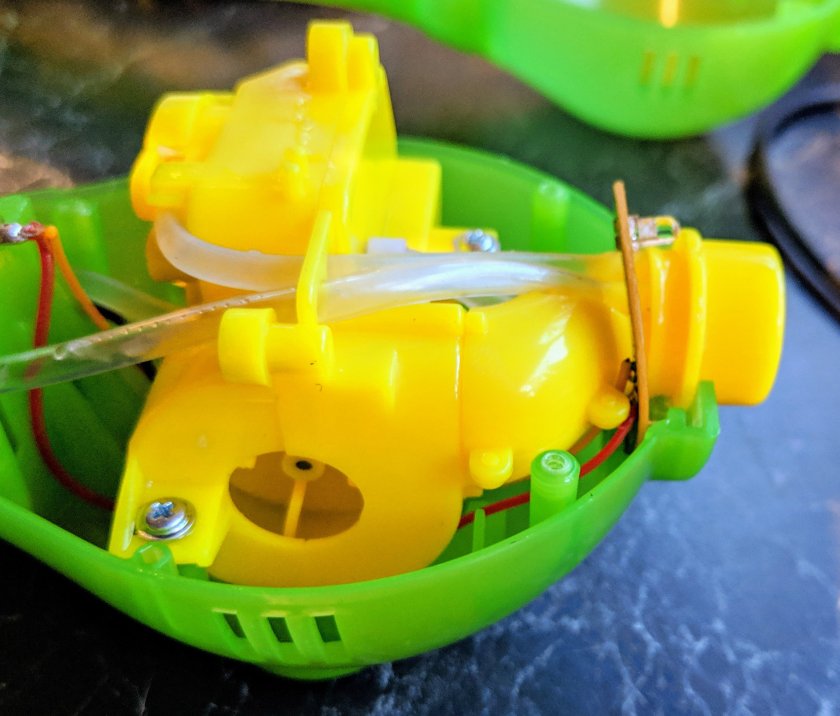
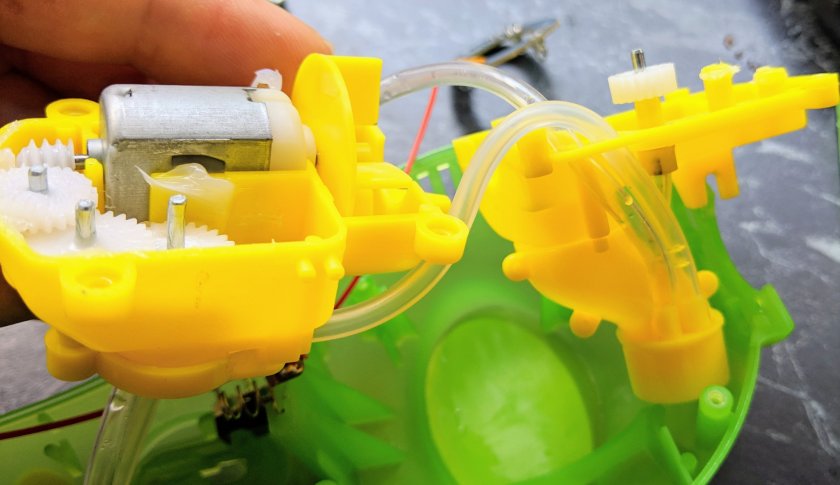
On opening the housing I was very impressed with the design simplicity the engineers achieved.
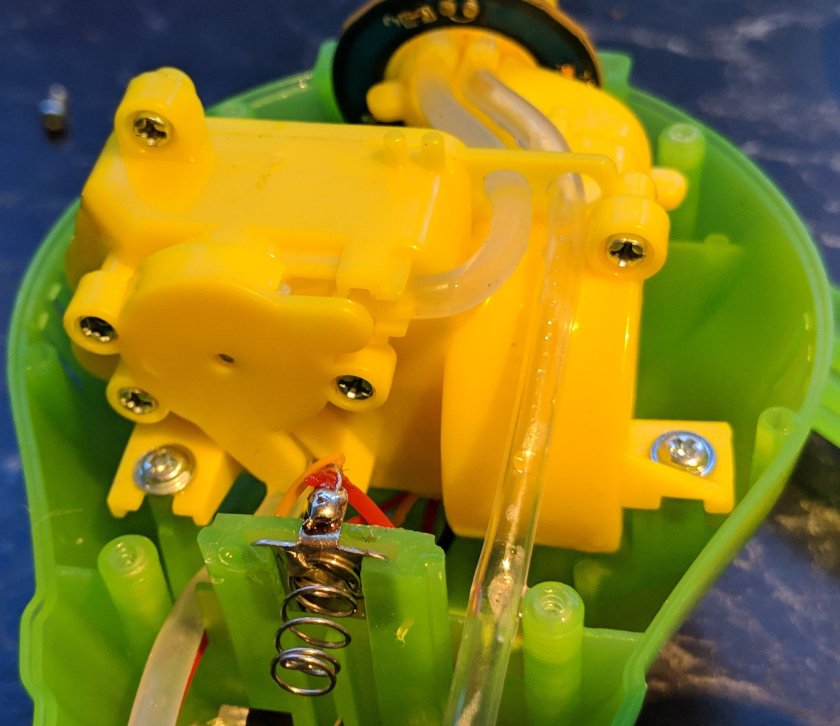
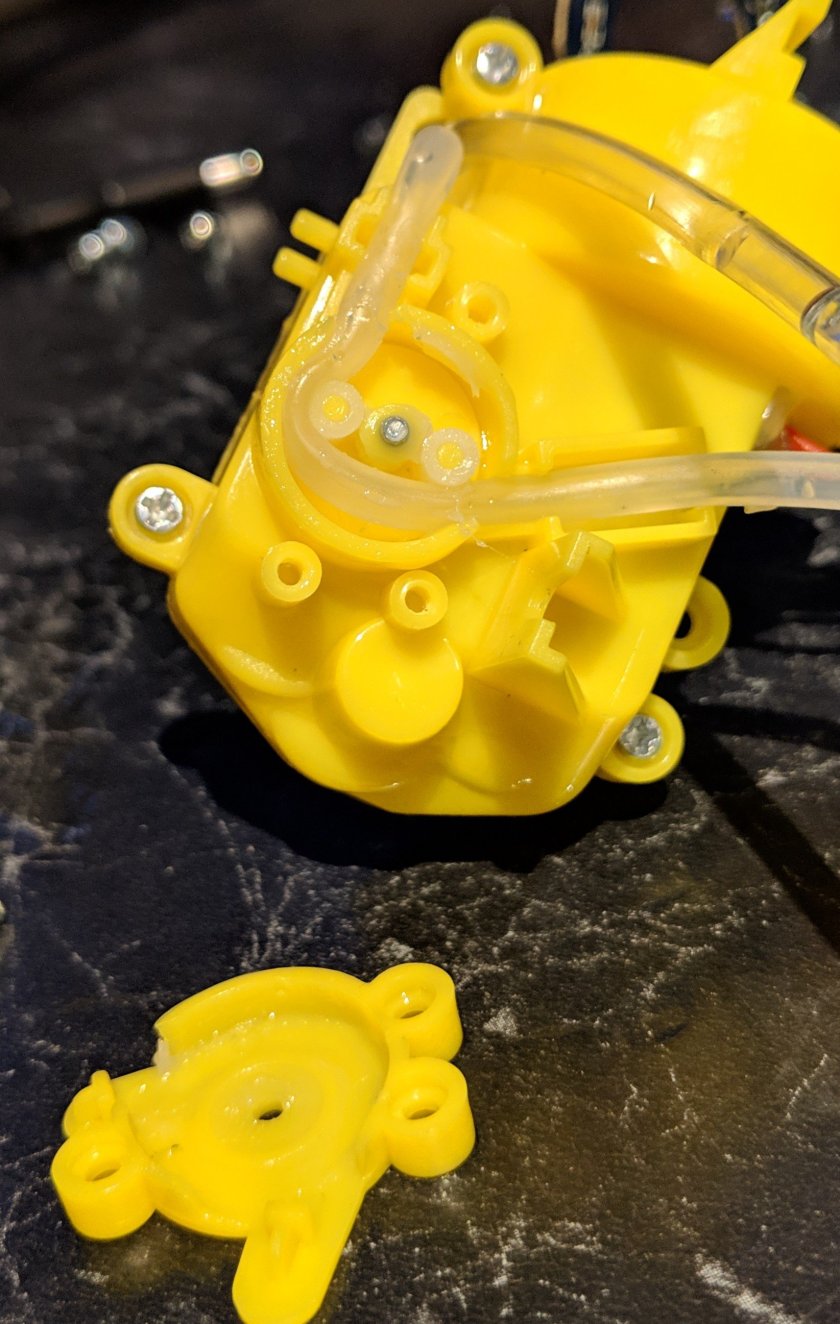
A single mabuchi 130 style motor drives the air blower, a peristaltic pump AND A little wiper in the nozzle that spreads the bubble fluid over the exhaust of the blower.
I especially liked the use of a farm machinery style power take off with a flexible shaft made of the same silicone tubing as the intake hose. The return hose is cheaper vinyl as it doesn’t need the squishiness required for the intake hose to work inside the peristaltic pump.
I’m still figuring out why the gearbox is so loud.
Picked this beauty up at a car boot sale for $2 with a $10 mig welder. If only more of the stalls were full of such interesting stuff. On first power up some of the magic smoke came out of the mains power supply but the scriber worked! After prying open the worlds cheapest all metal enclosure to see where the smoke originated from in the power supply all seemed fine apart from 30 years of dust on everything.
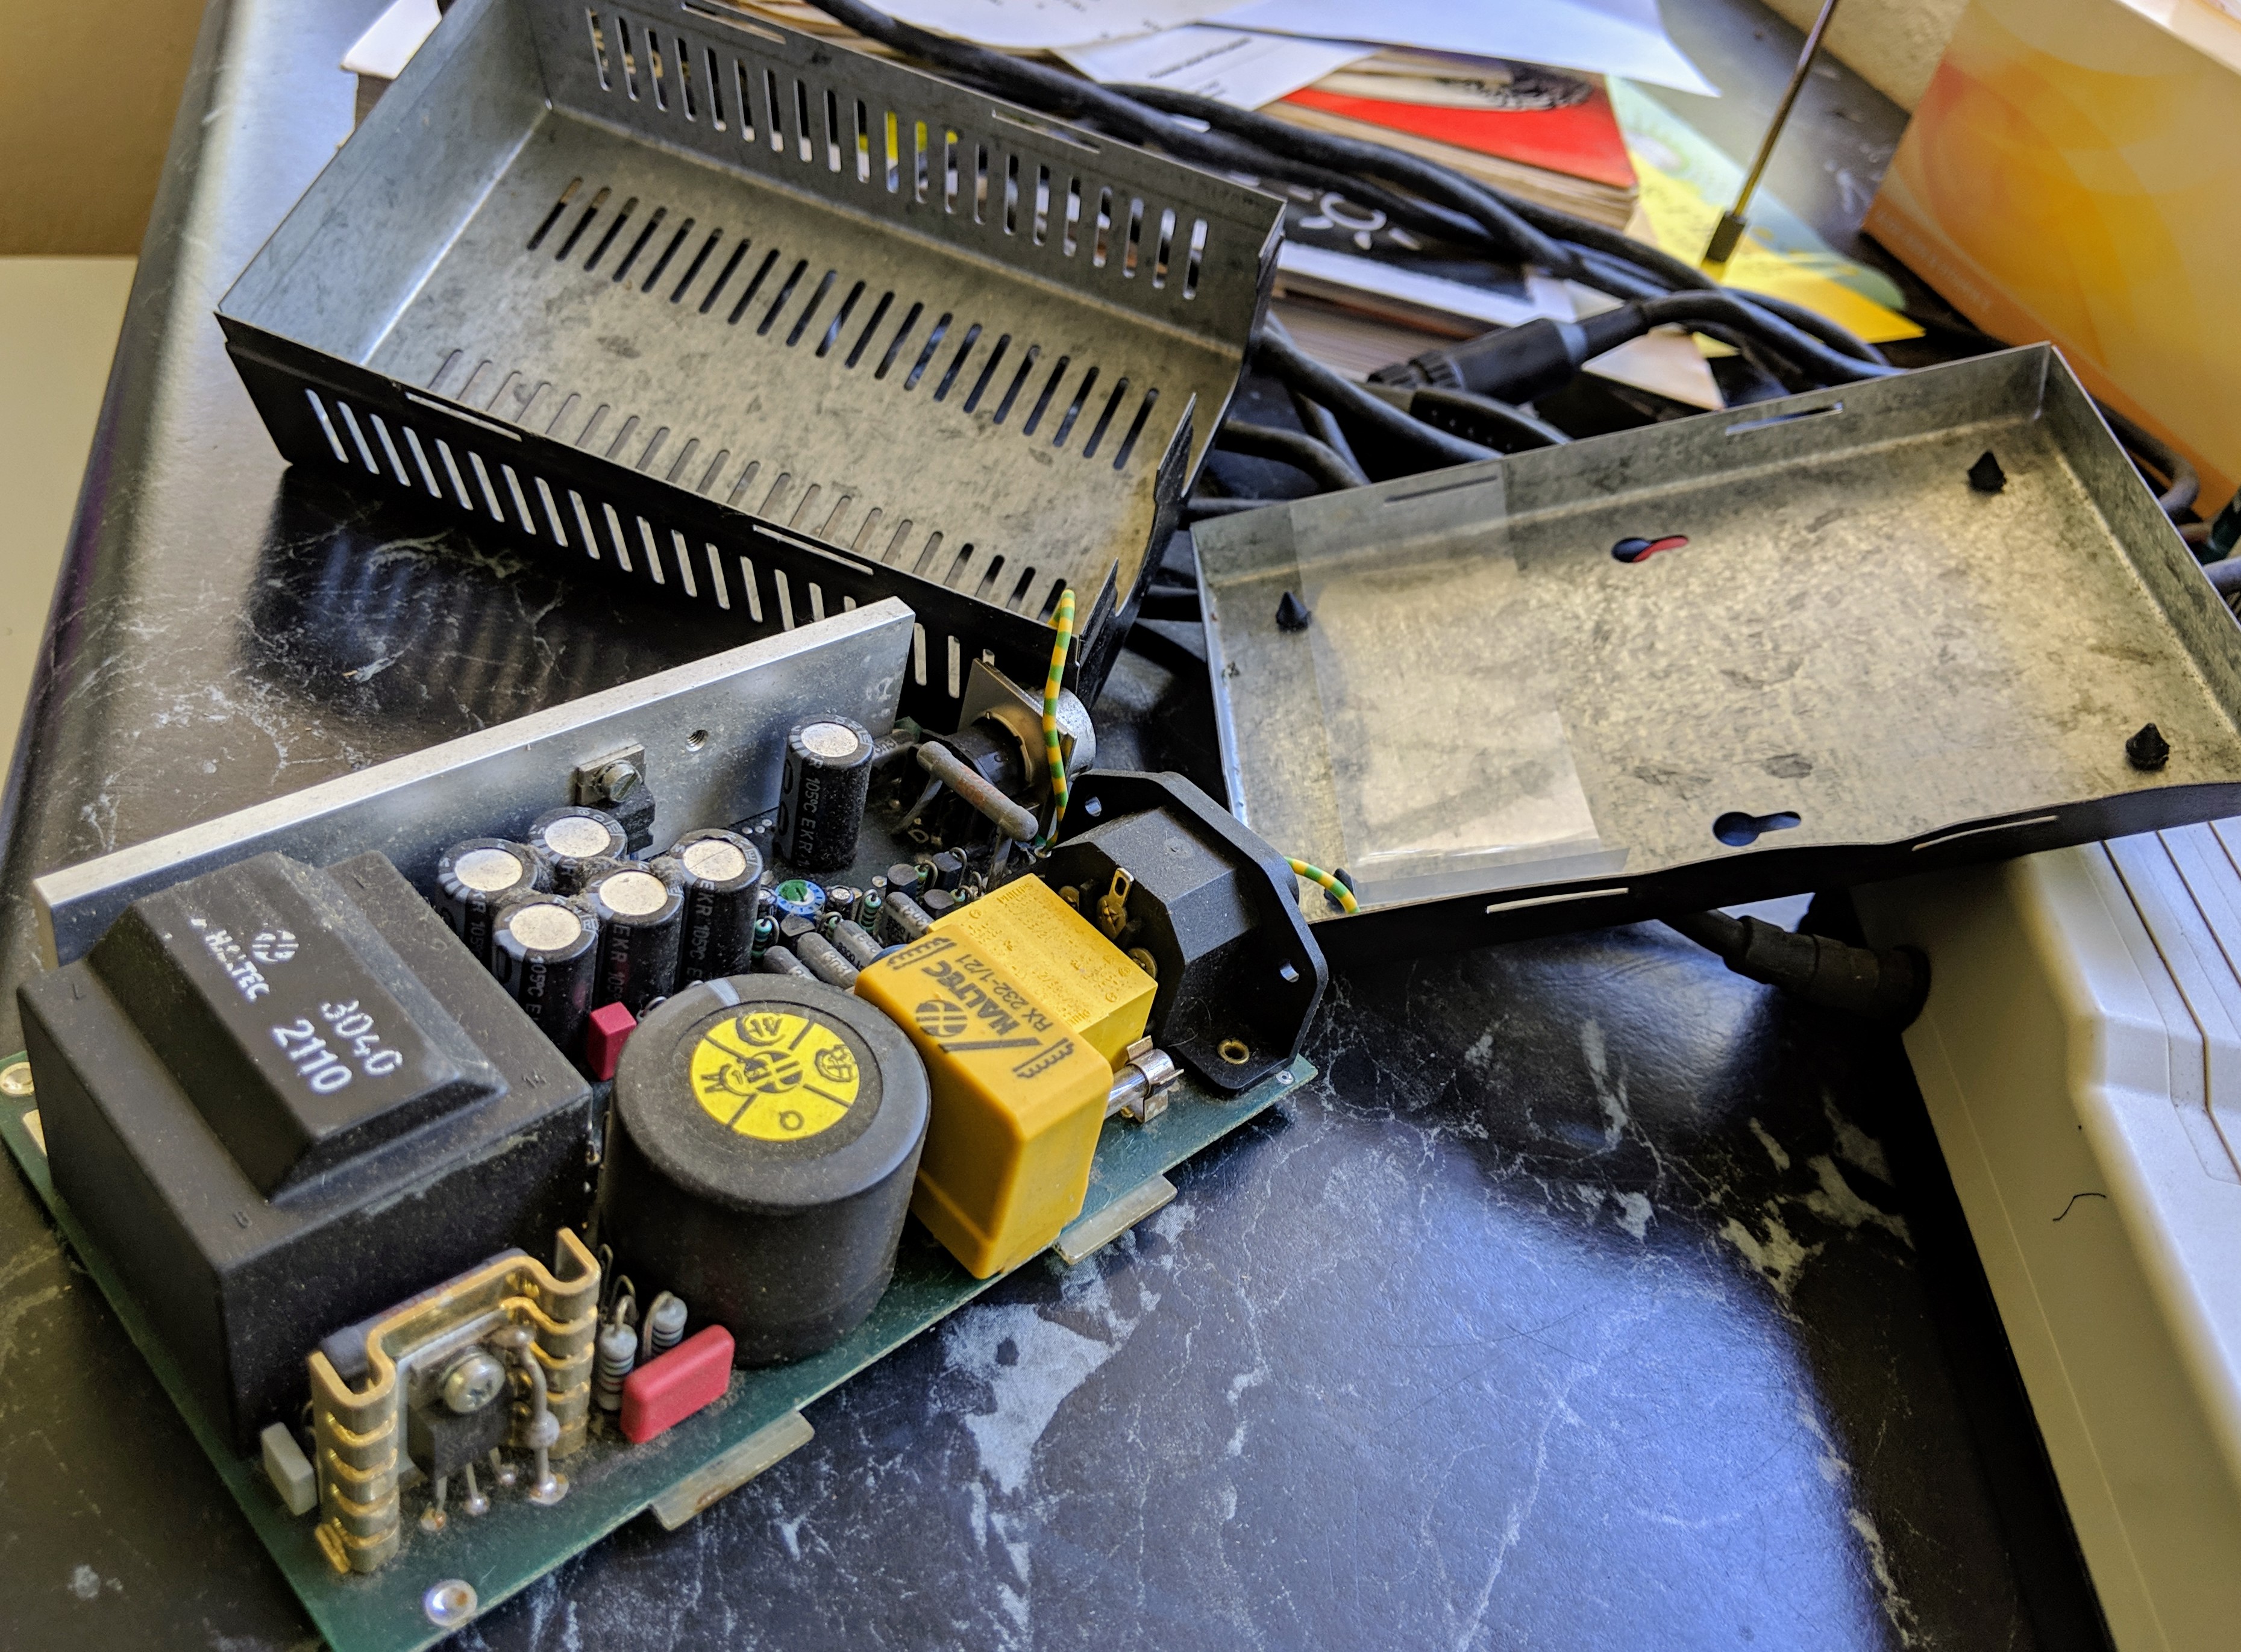
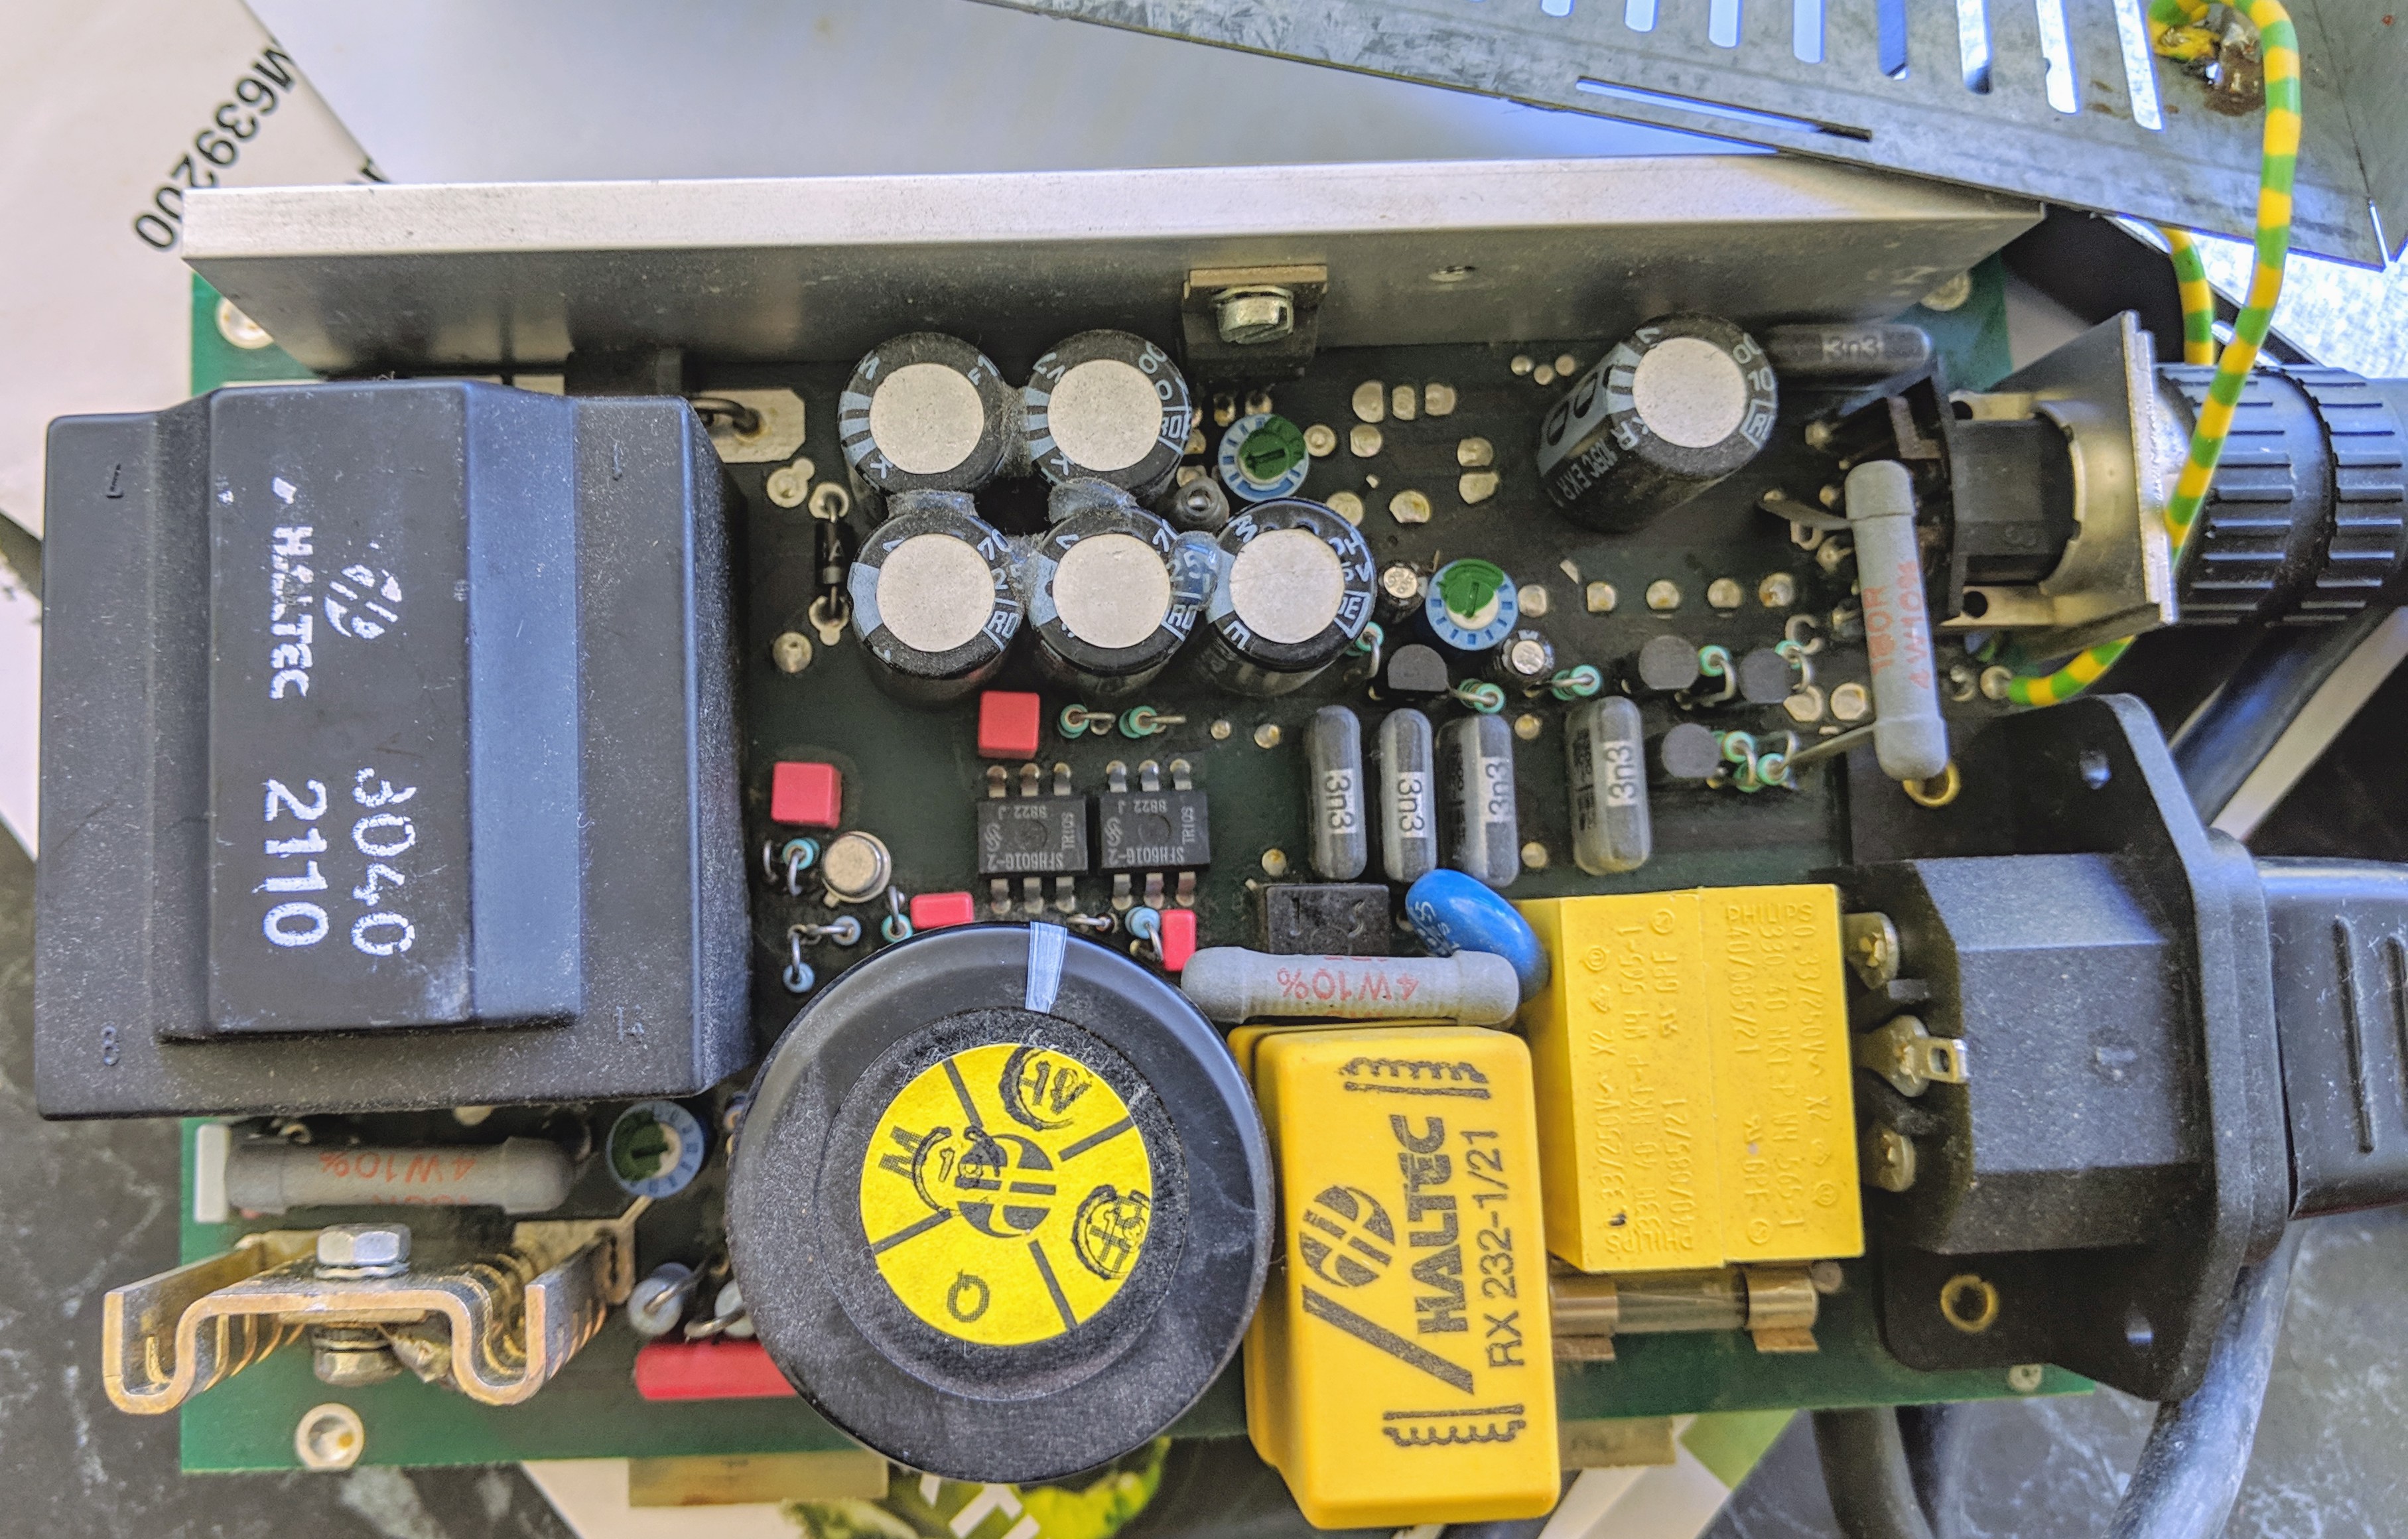
Worlds cheapest all metal enclosure. Two stamped sheets of steel hooked over tabs extending from the pcb. The metal is thin and the edges are sharp.Despite the cheap enclosure it looks like a decent quality Haltec brand power supply inside. Note the bare fibreglass tabs for the top and bottom covers to engage.
Behind that small heatsink at the front left is a 4 watt resistor mounted 10mm above the pcb which gets hot and was probably cooking the layer of dust on it before I cleaned board looking for fried components.
It still worked after that brief smoke release so I pressed on and measured the output voltages just incase it died and I had to replace it to play with the scriber. So the five output wires had +5v, +10.2v and either +26v or -15.8v depending on what pairs you measure. Since it hasn’t failed I just noted down the wire colours and voltages between each wire of the output lead for now. Listed below for future NC-Scriber users.
Brown – Gray 15.8v Brown+
White – Yellow 5v White+
Gray – Green 26v Green+
Green – Brown 10.2v Green
Update:
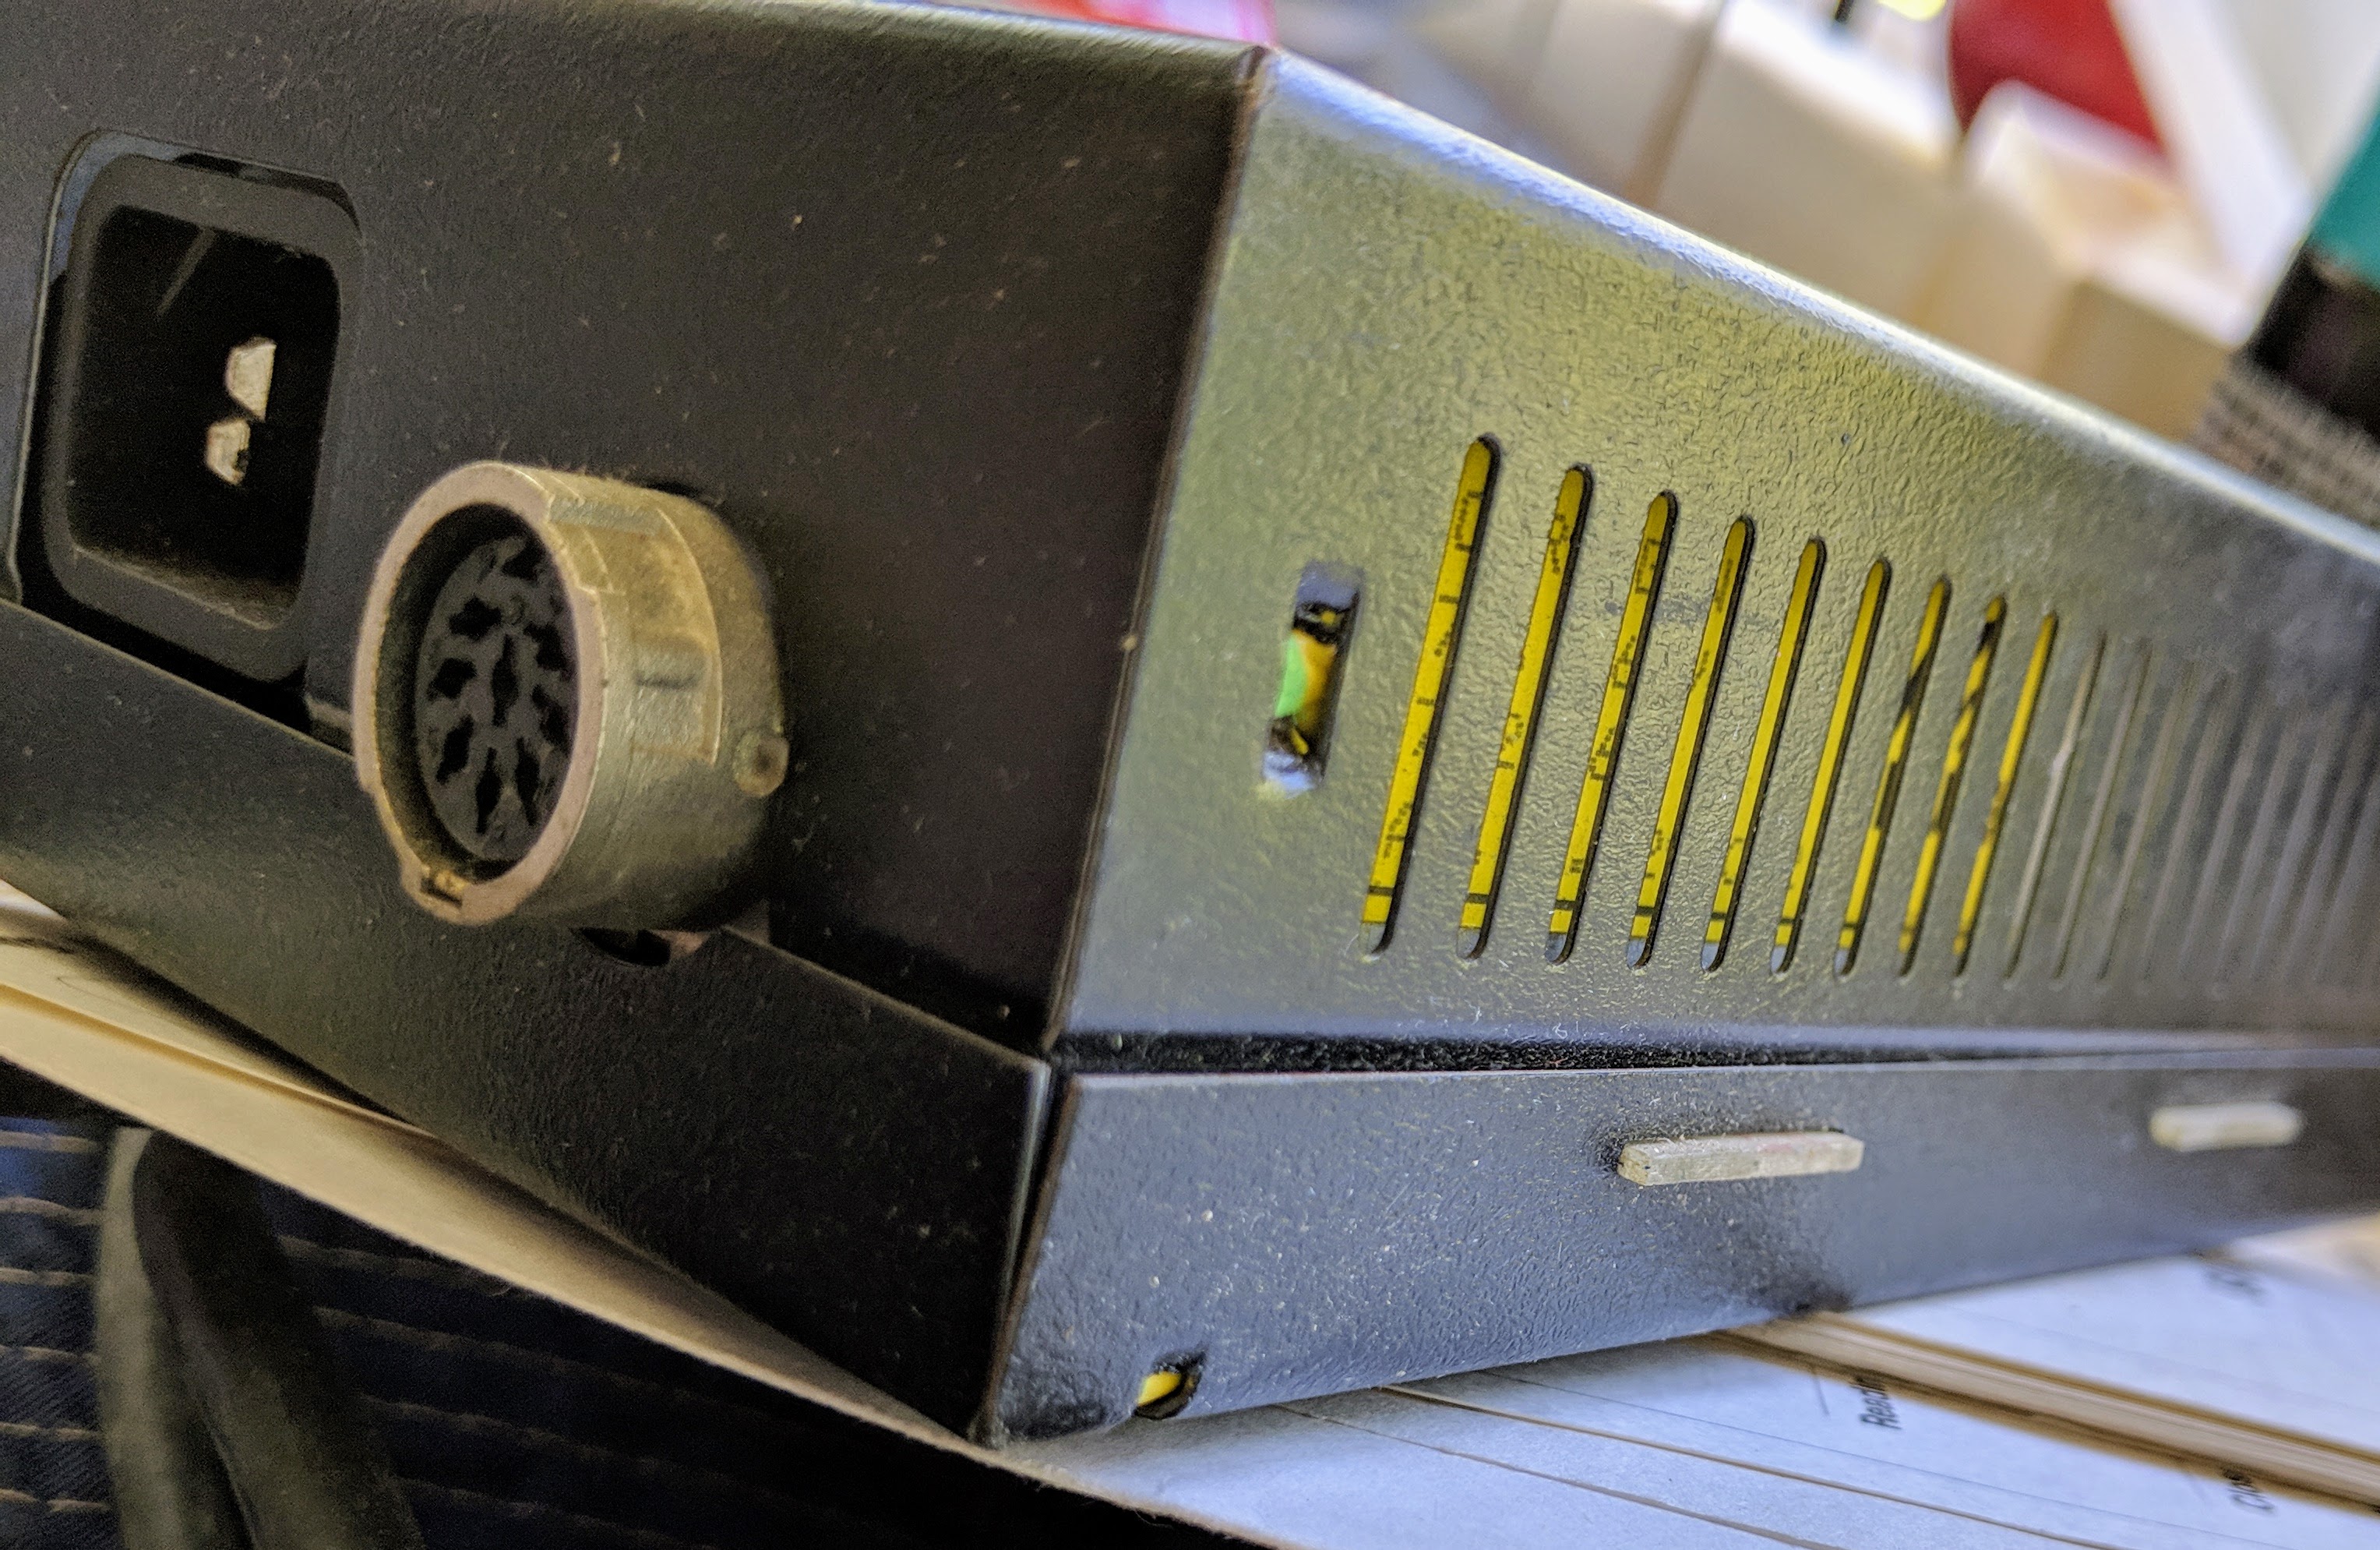
After someone asked on YouTube about the power requirements to get their own plotter running I did some more in-depth tests and PCB track chasing on the plotter while powered. Can’t guarantee this will work but my NC-50 plotter is supplied with 5v DC and Ground (to power the electronics) and a second pair of wires with 16v DC and ground (to power the motor and solenoid drivers). There is also what looks to be an enable signal wire that turns on the power supply when the rocker switch on the plotter (to the right of the screen) is switched on. The enable wire is held to the electronics ground when the switch is off.
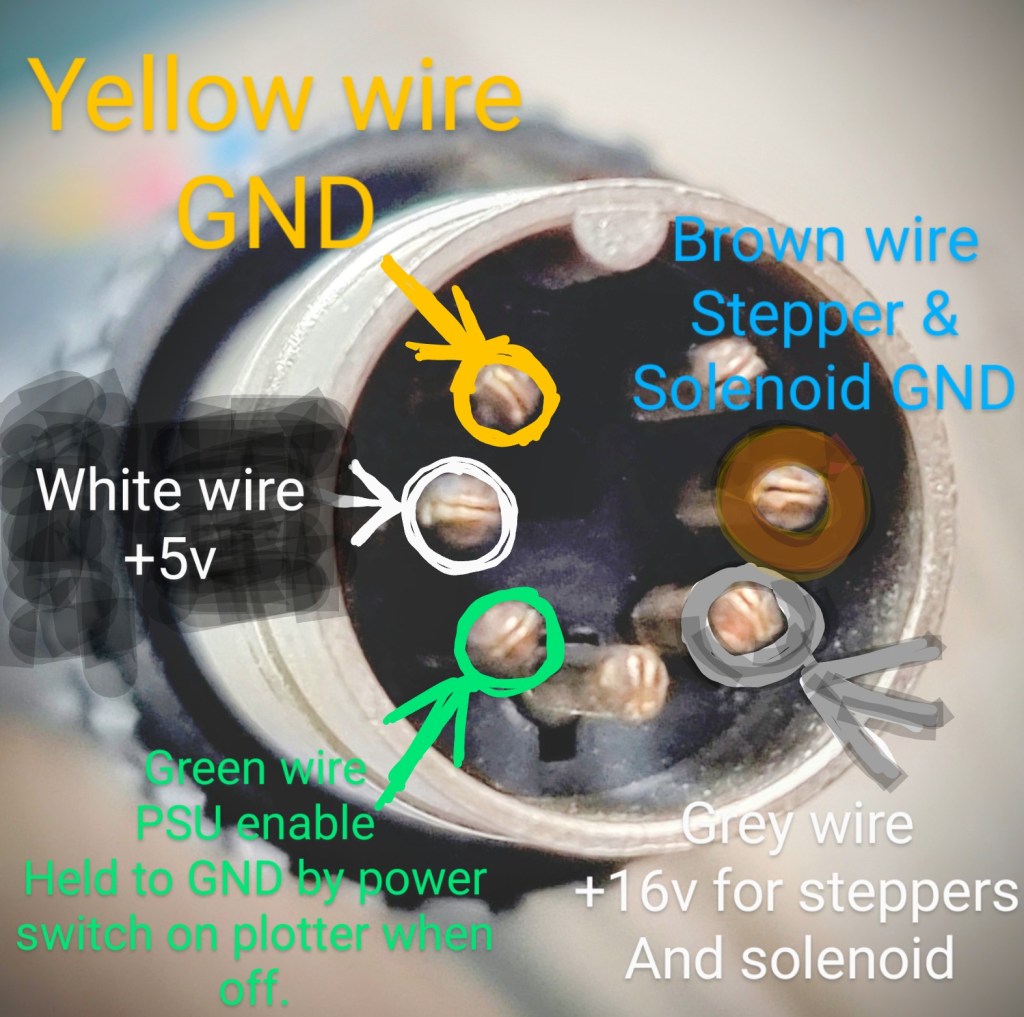
yellow wire: electronics ground
White wire: 5v DC for electronics
Green wire: power supply enable signal
Grey wire: 16v DC for motor drivers
Brown wire: motor drivers ground
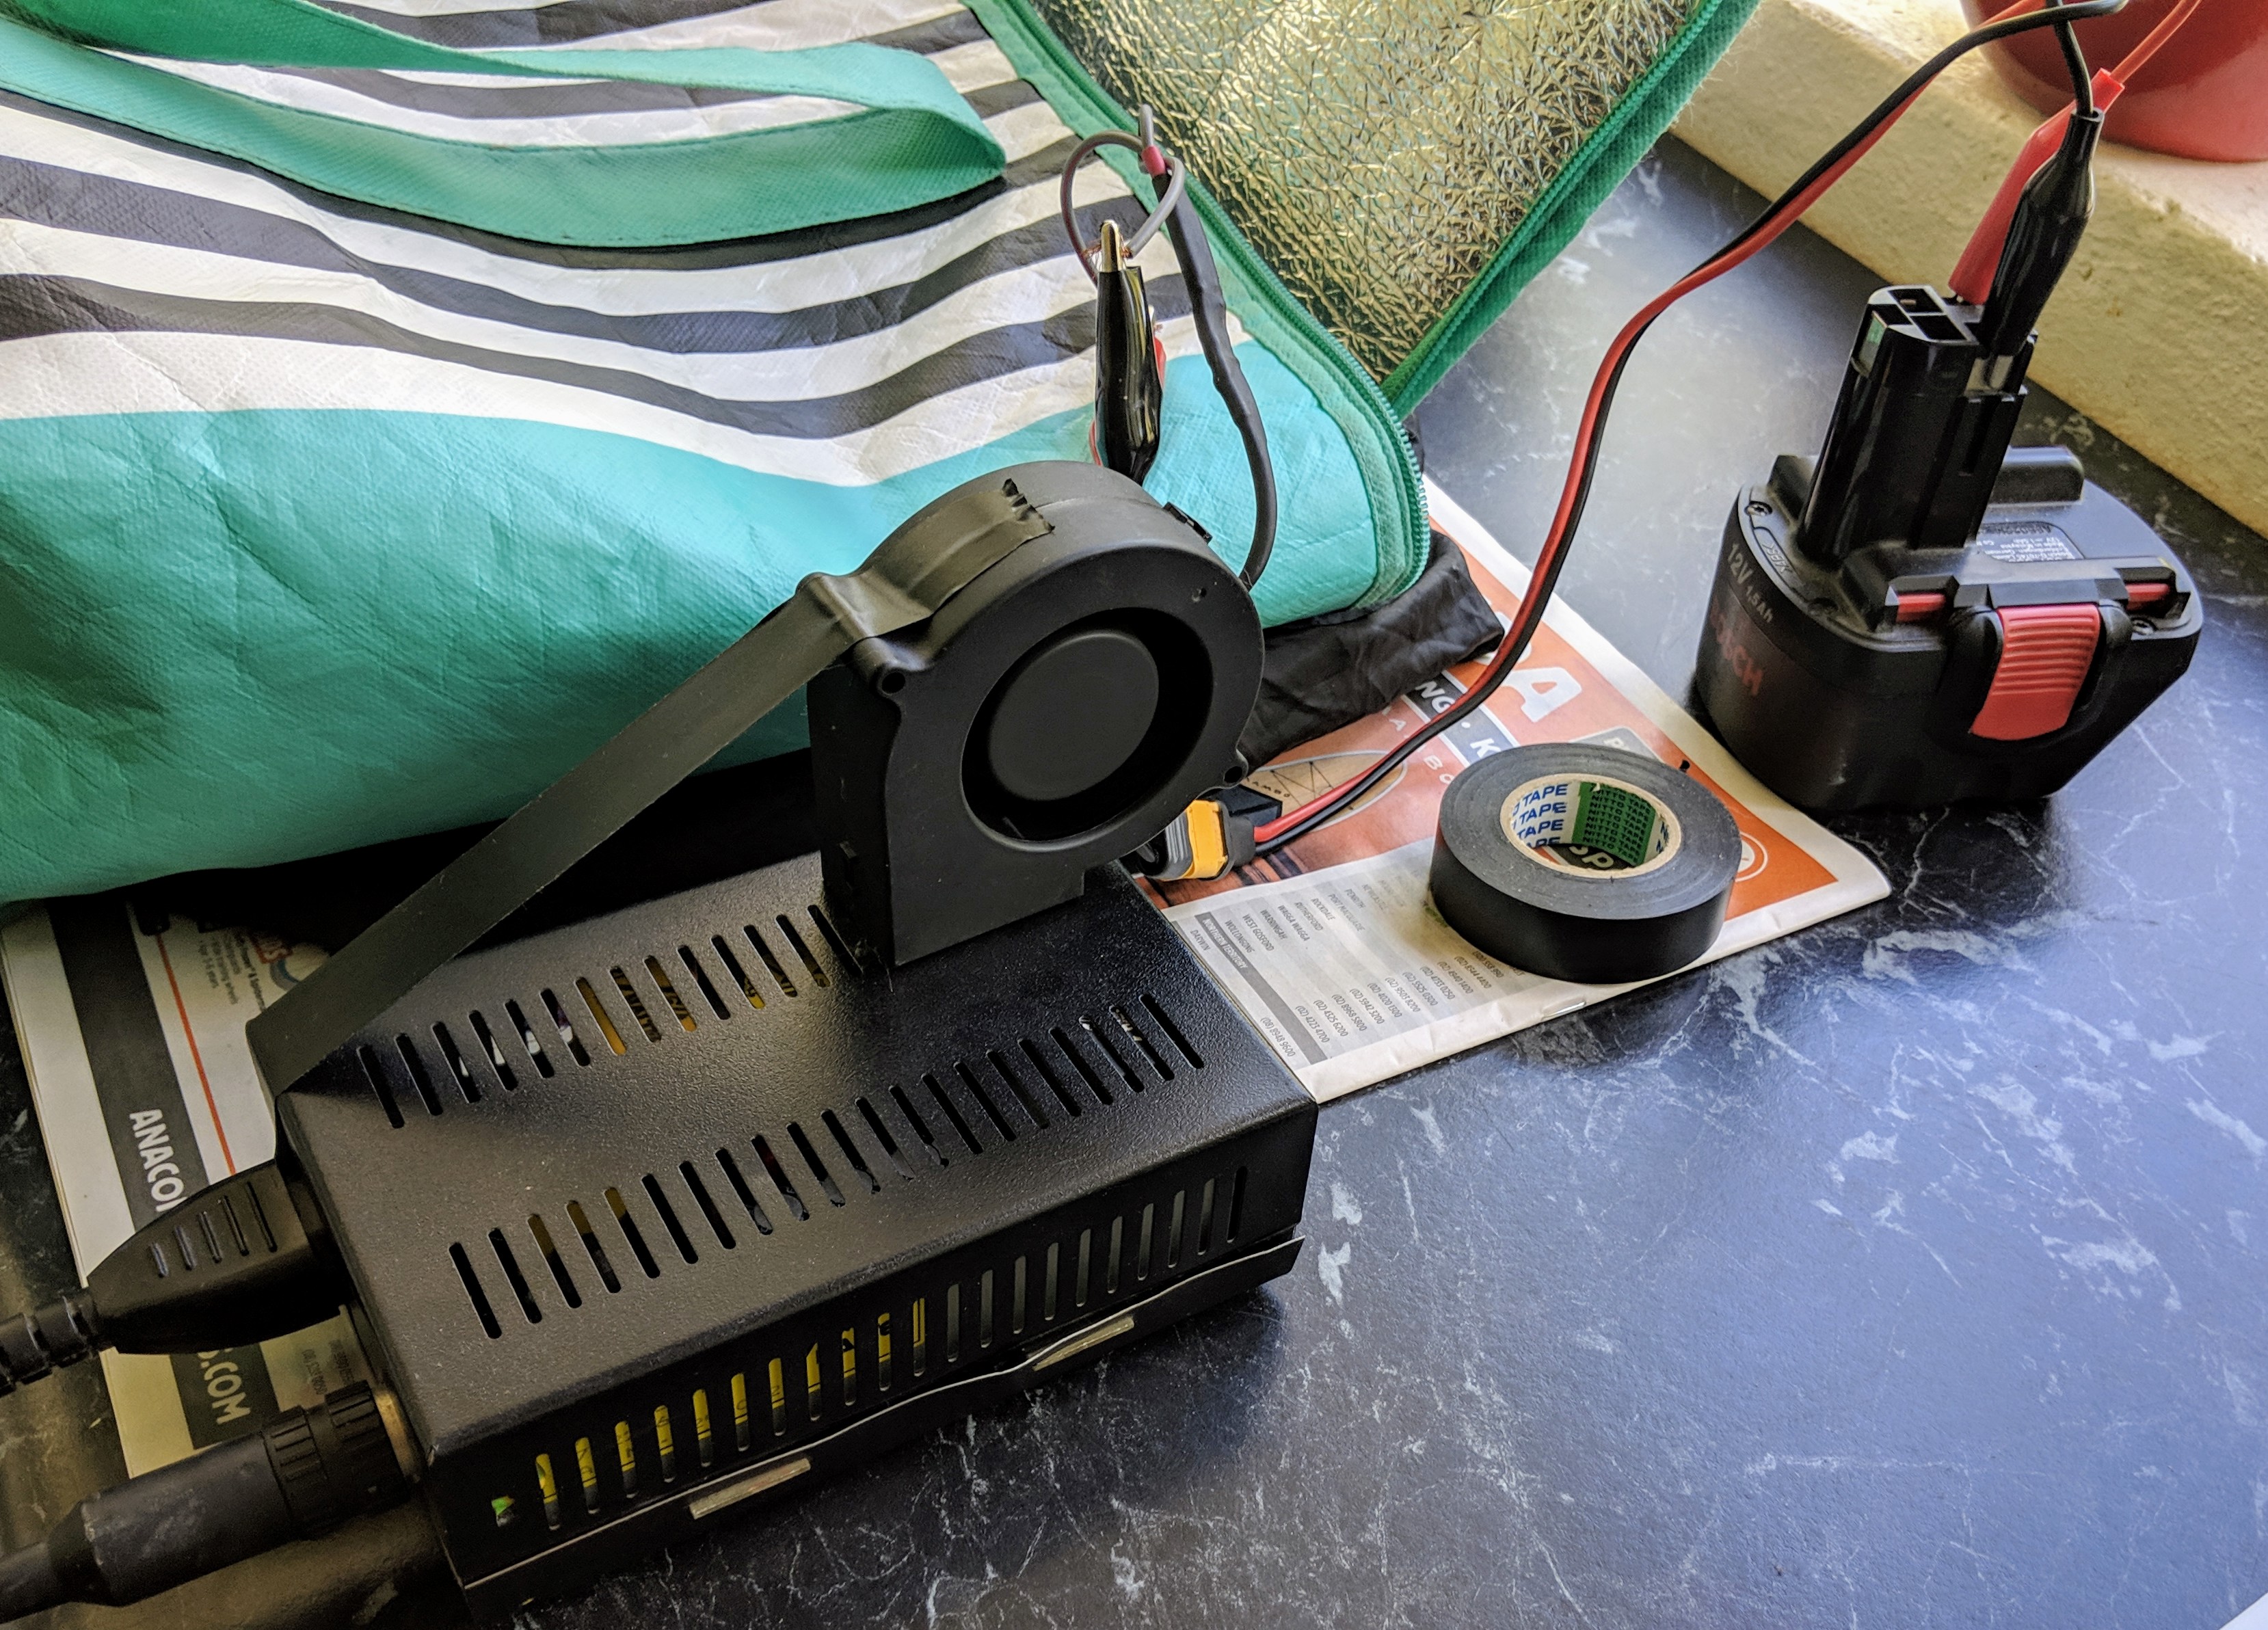
This is the pinout of the 7 pin plug that connects to the power supply.Extra cooling via a 12v fan. Classy Right?
Anyway, on with the show. I rested a small PC fan on top of the power supply blowing in through the vents and powered up once more.
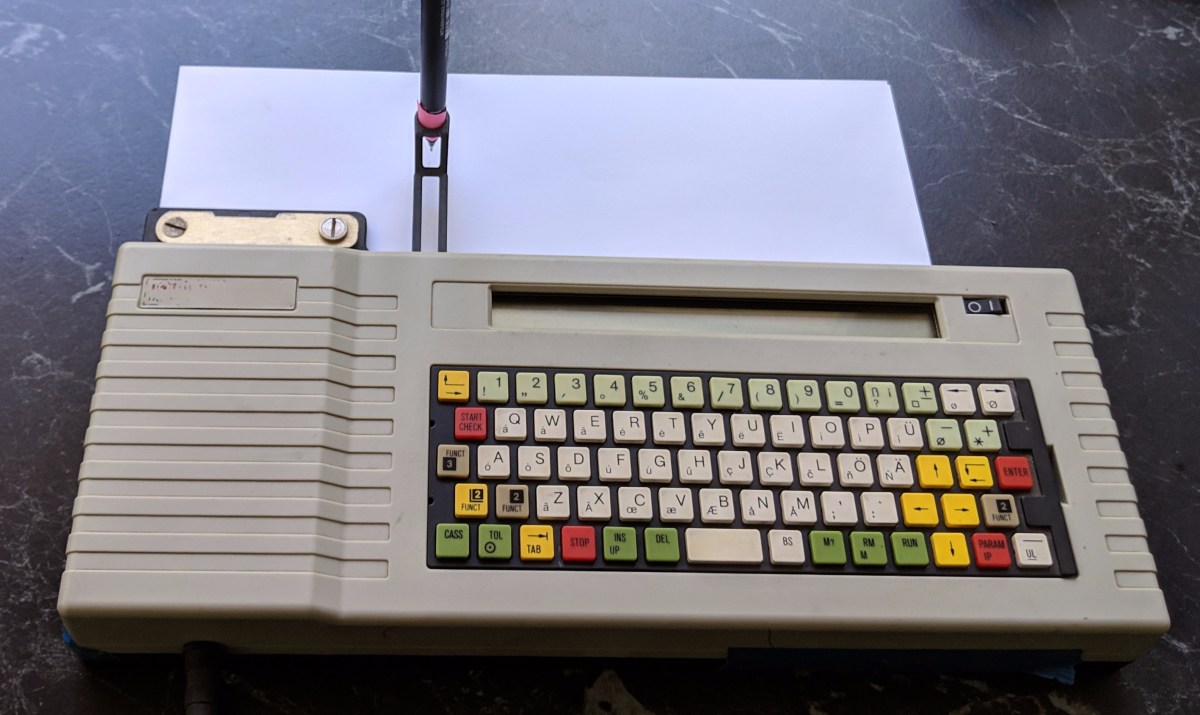
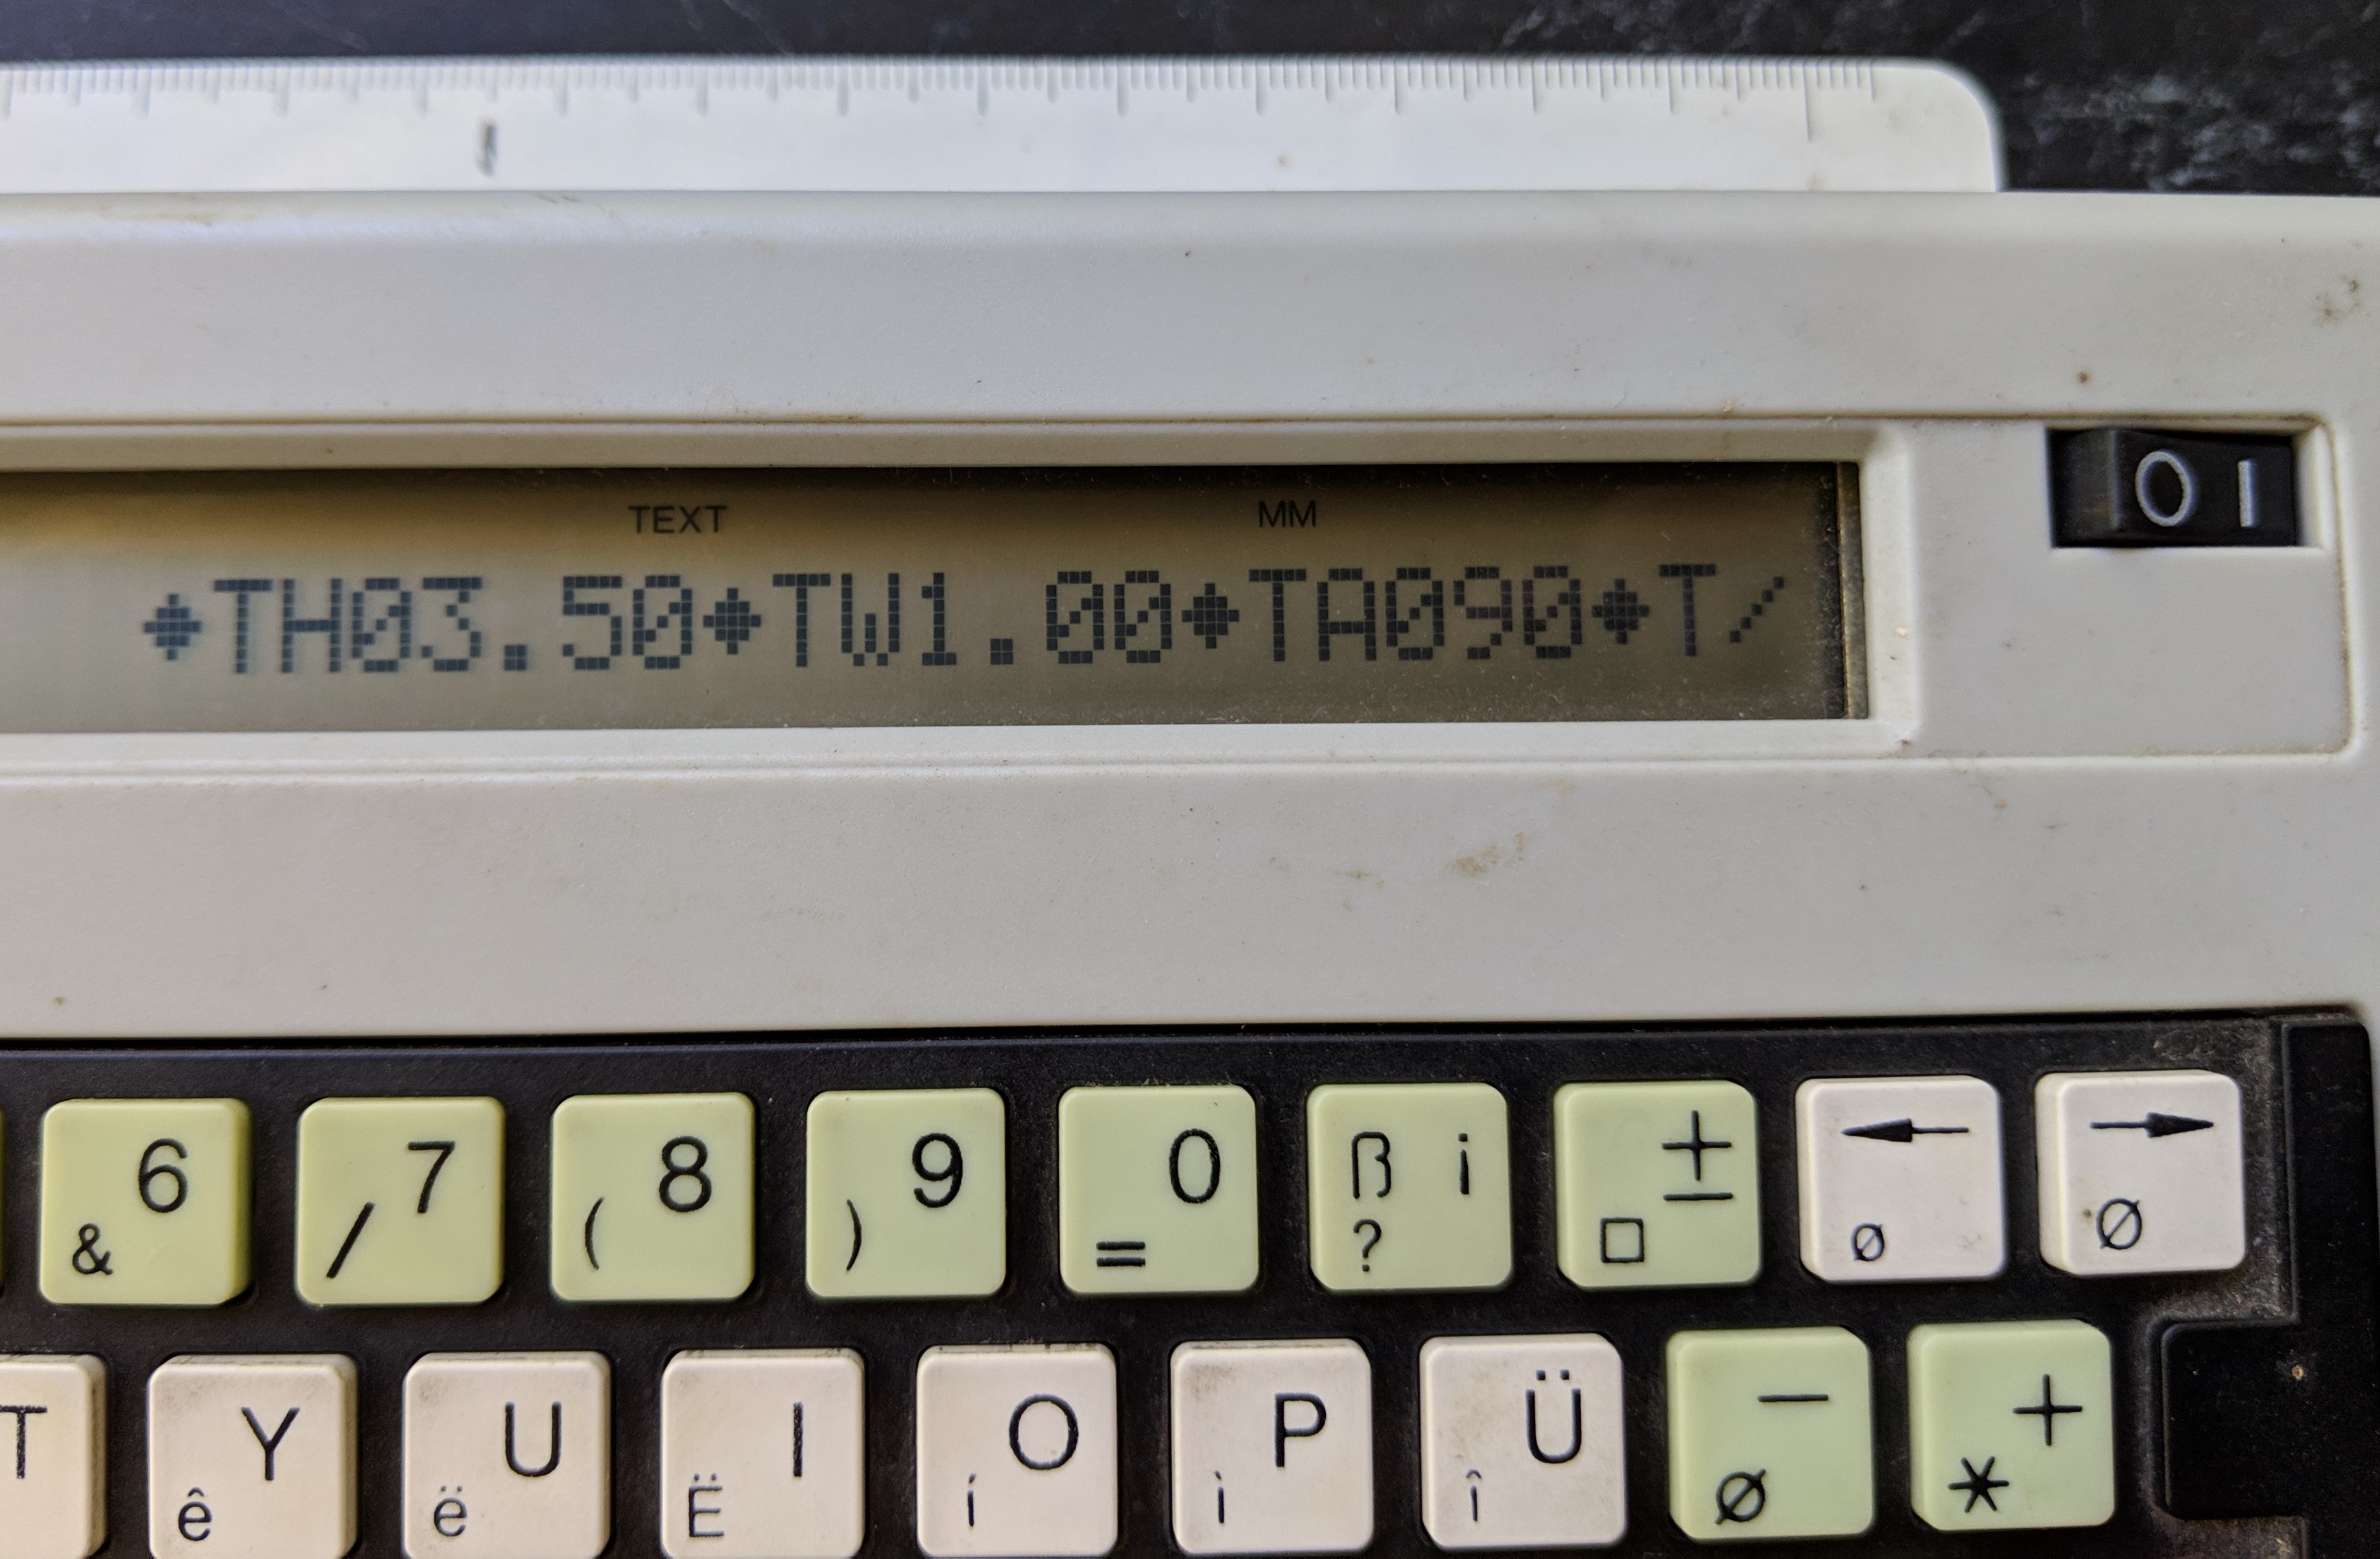
love that no nonsense home screen. Text height in mm (1-30), Text width factor (0.01 -9.99) and Text angle in deg (75, 90 or 105)
The oddest thing about the NC-scriber is the instant plotting. Unlike modern label makers which let you type your text, check it, then print the label. This thing puts pen to paper as soon as you hit the keys! Makes for cautious typing as you may notice in the videos.
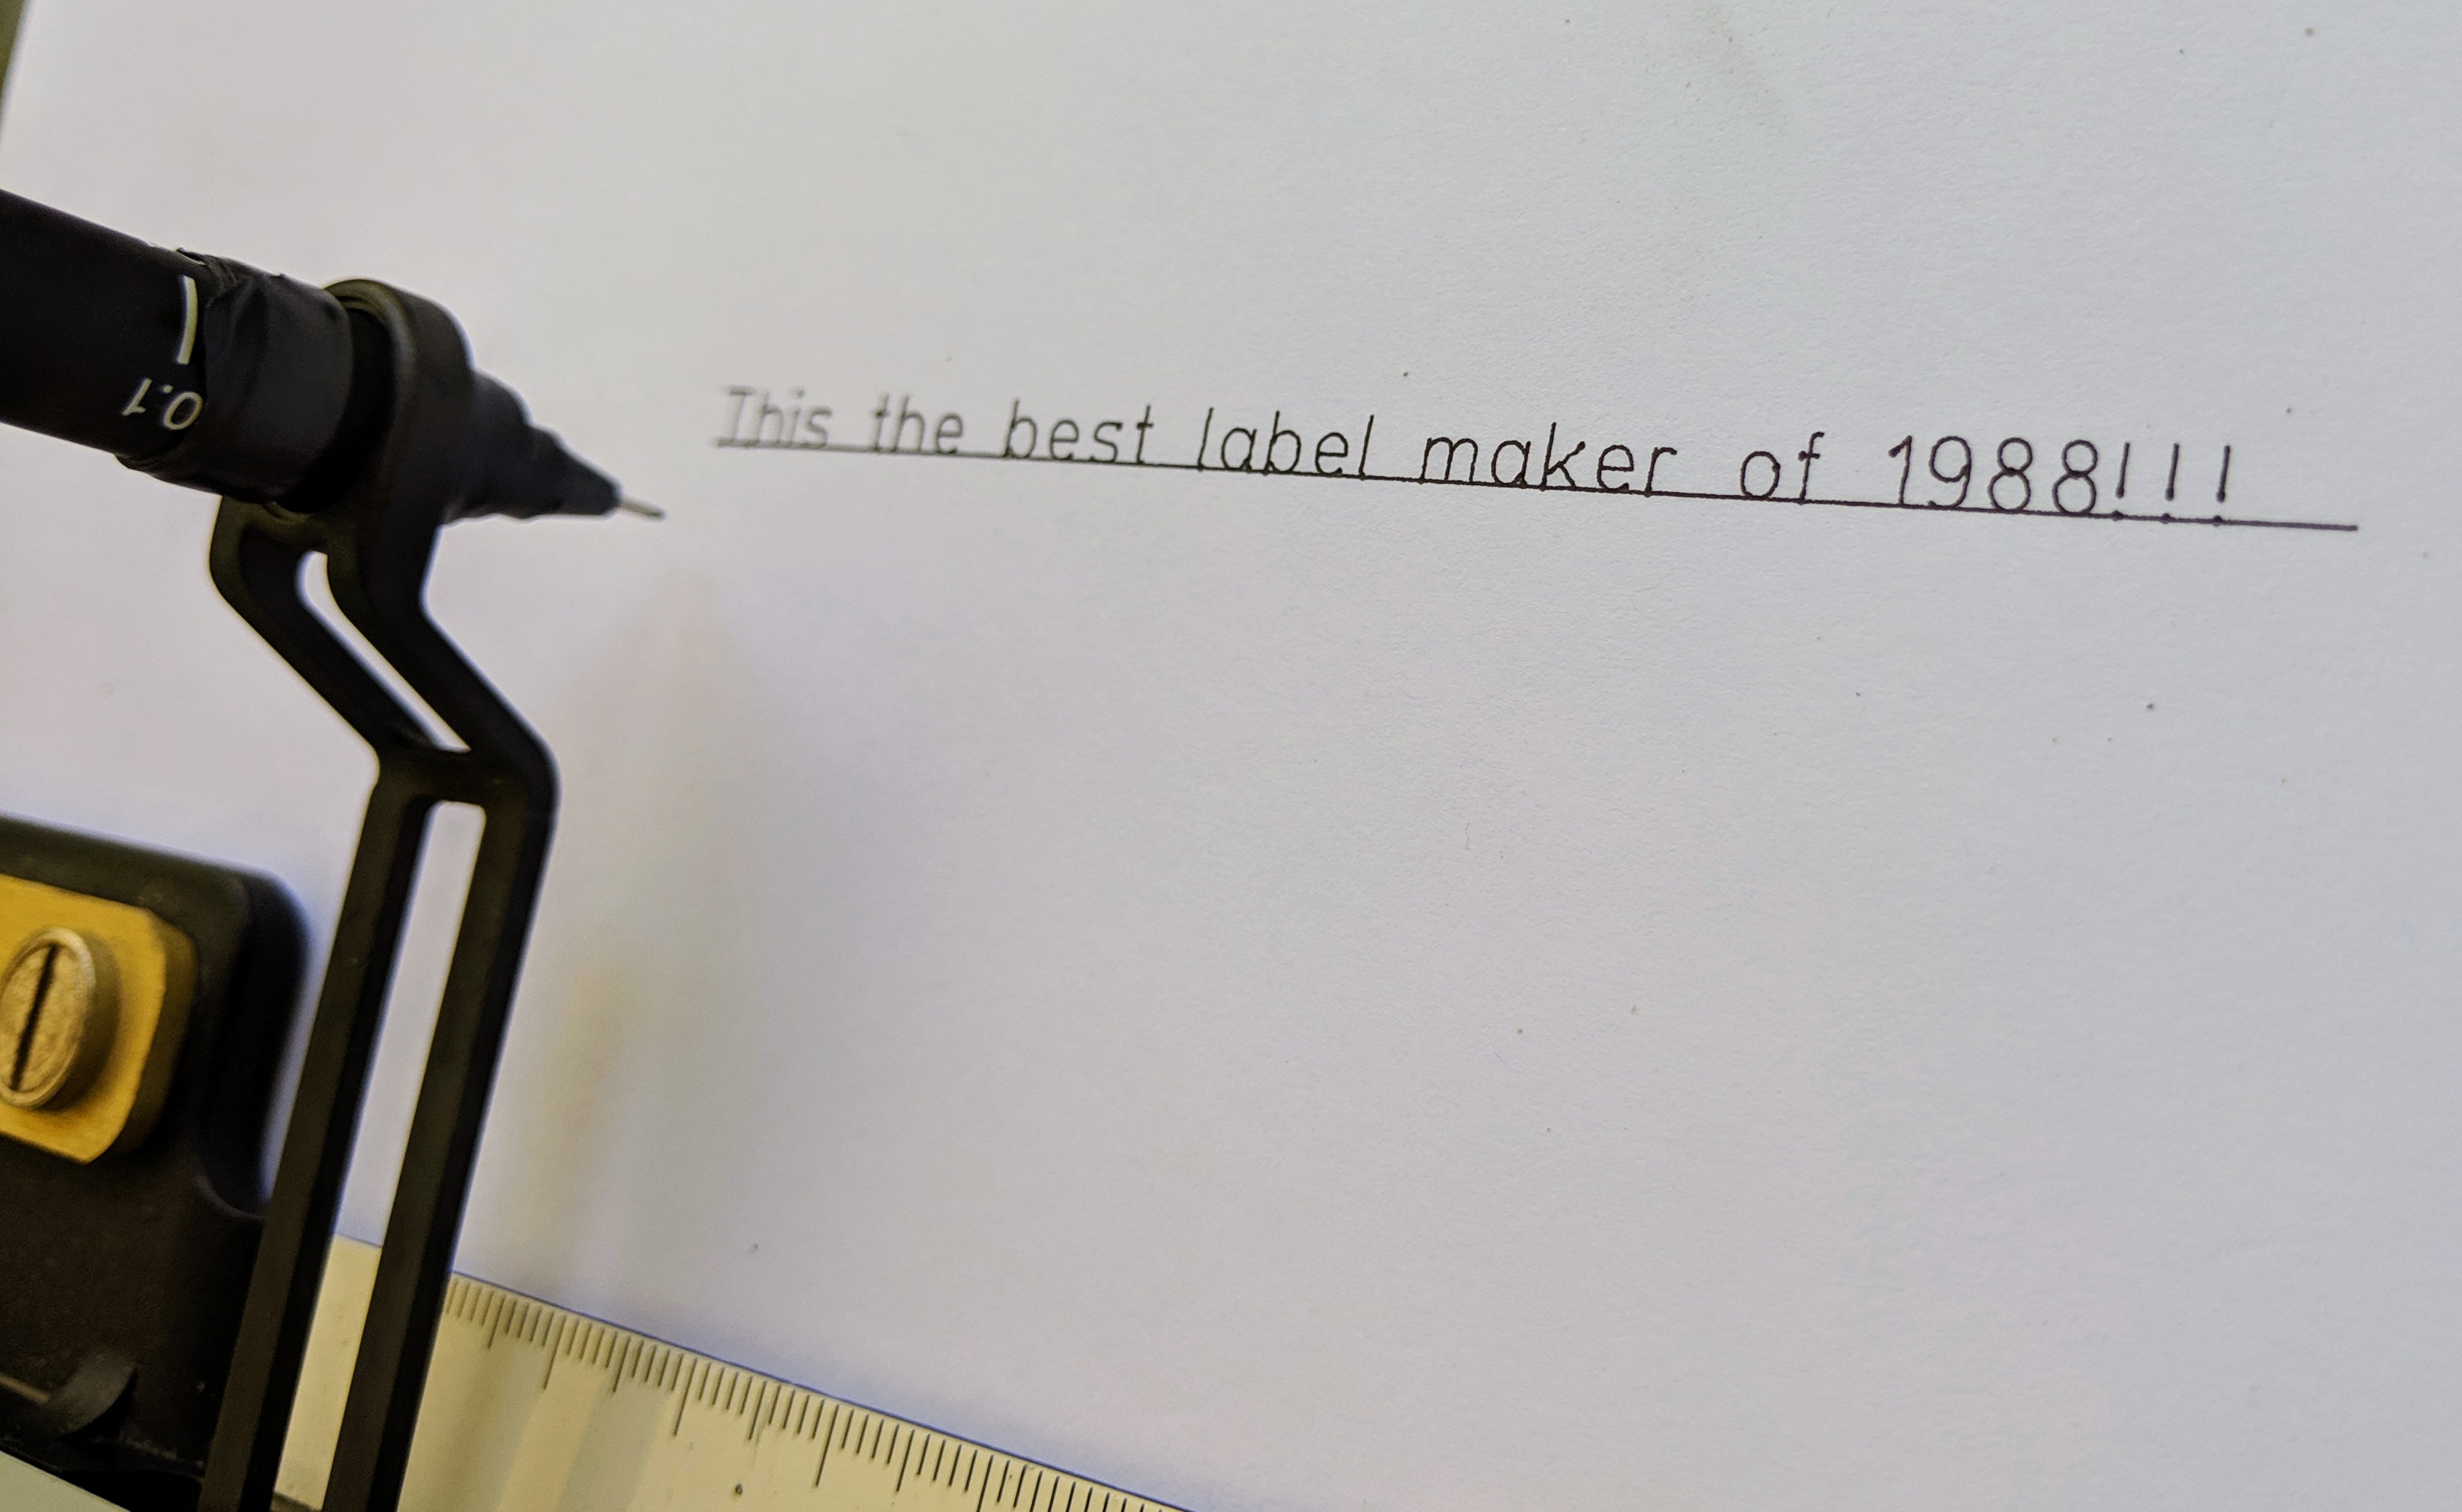
With the right pen (not the actual right pen, But a good 0.1 fineliner) wedged into the threaded pen holder the text is remarkably good.
The holder is threaded to mate with rOtrings line of drafting pens with screw on caps like the isograph and rapidograph. I looked for cheap alternatives or used ones but they’re pricey ($30-$90 AUD). So I wrapped the pen I had in A scrap of paper and wedged/twisted it into the threaded holder. Later changed the pink paper out for black electrical tape I had used on the cooling fan.
By the way, the holder is made from a very hard fiber filled plastic.
Only once finished did I notice the missing “is”. Damn that plot as you type interface!
This thing is really good at what it does. You would attach it to your drawing machine (the big tilted desk with a ruler on an arm that you moved manually around the paper) and positioned the arm so the plotter could write things like scale markers and company details. Thus saving you, the busy architect or draftsperson from having to neatly write out the same text over and over. What a time to be alive, Right?
I plan to use it for all future passive aggressive work fridge door notes.
Or Art. with the motion controlled by modern electronics from the cnc world.
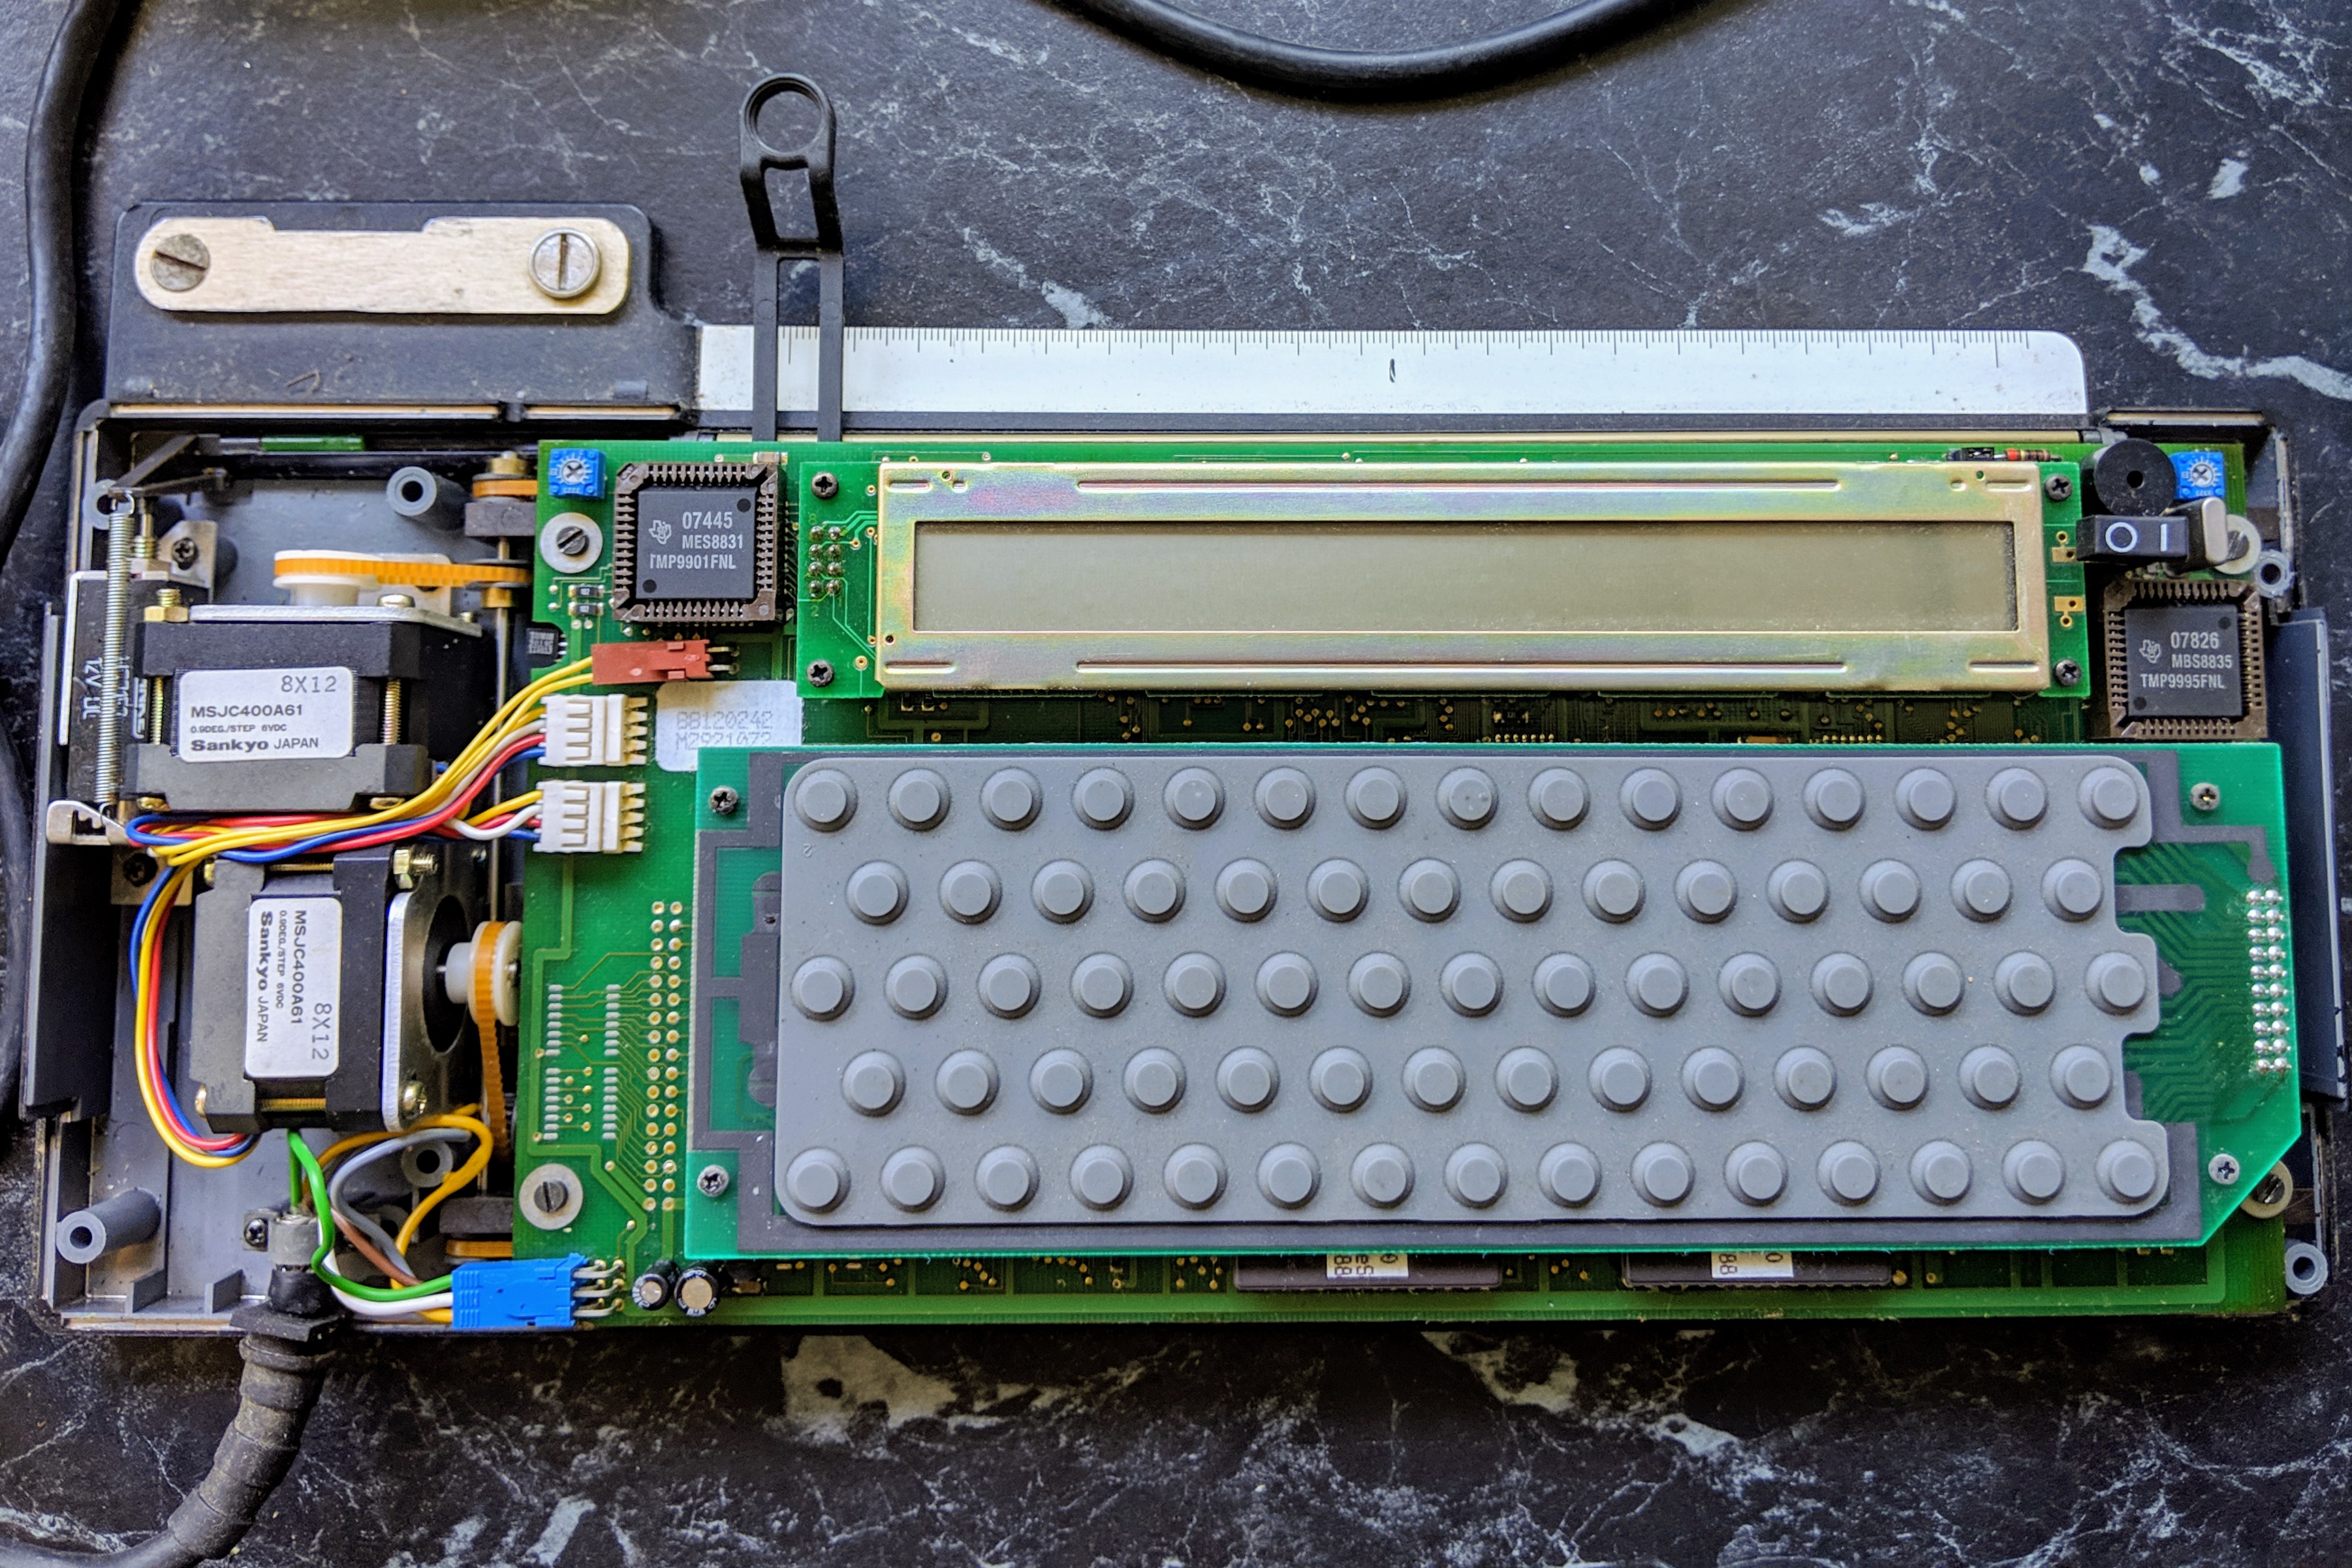
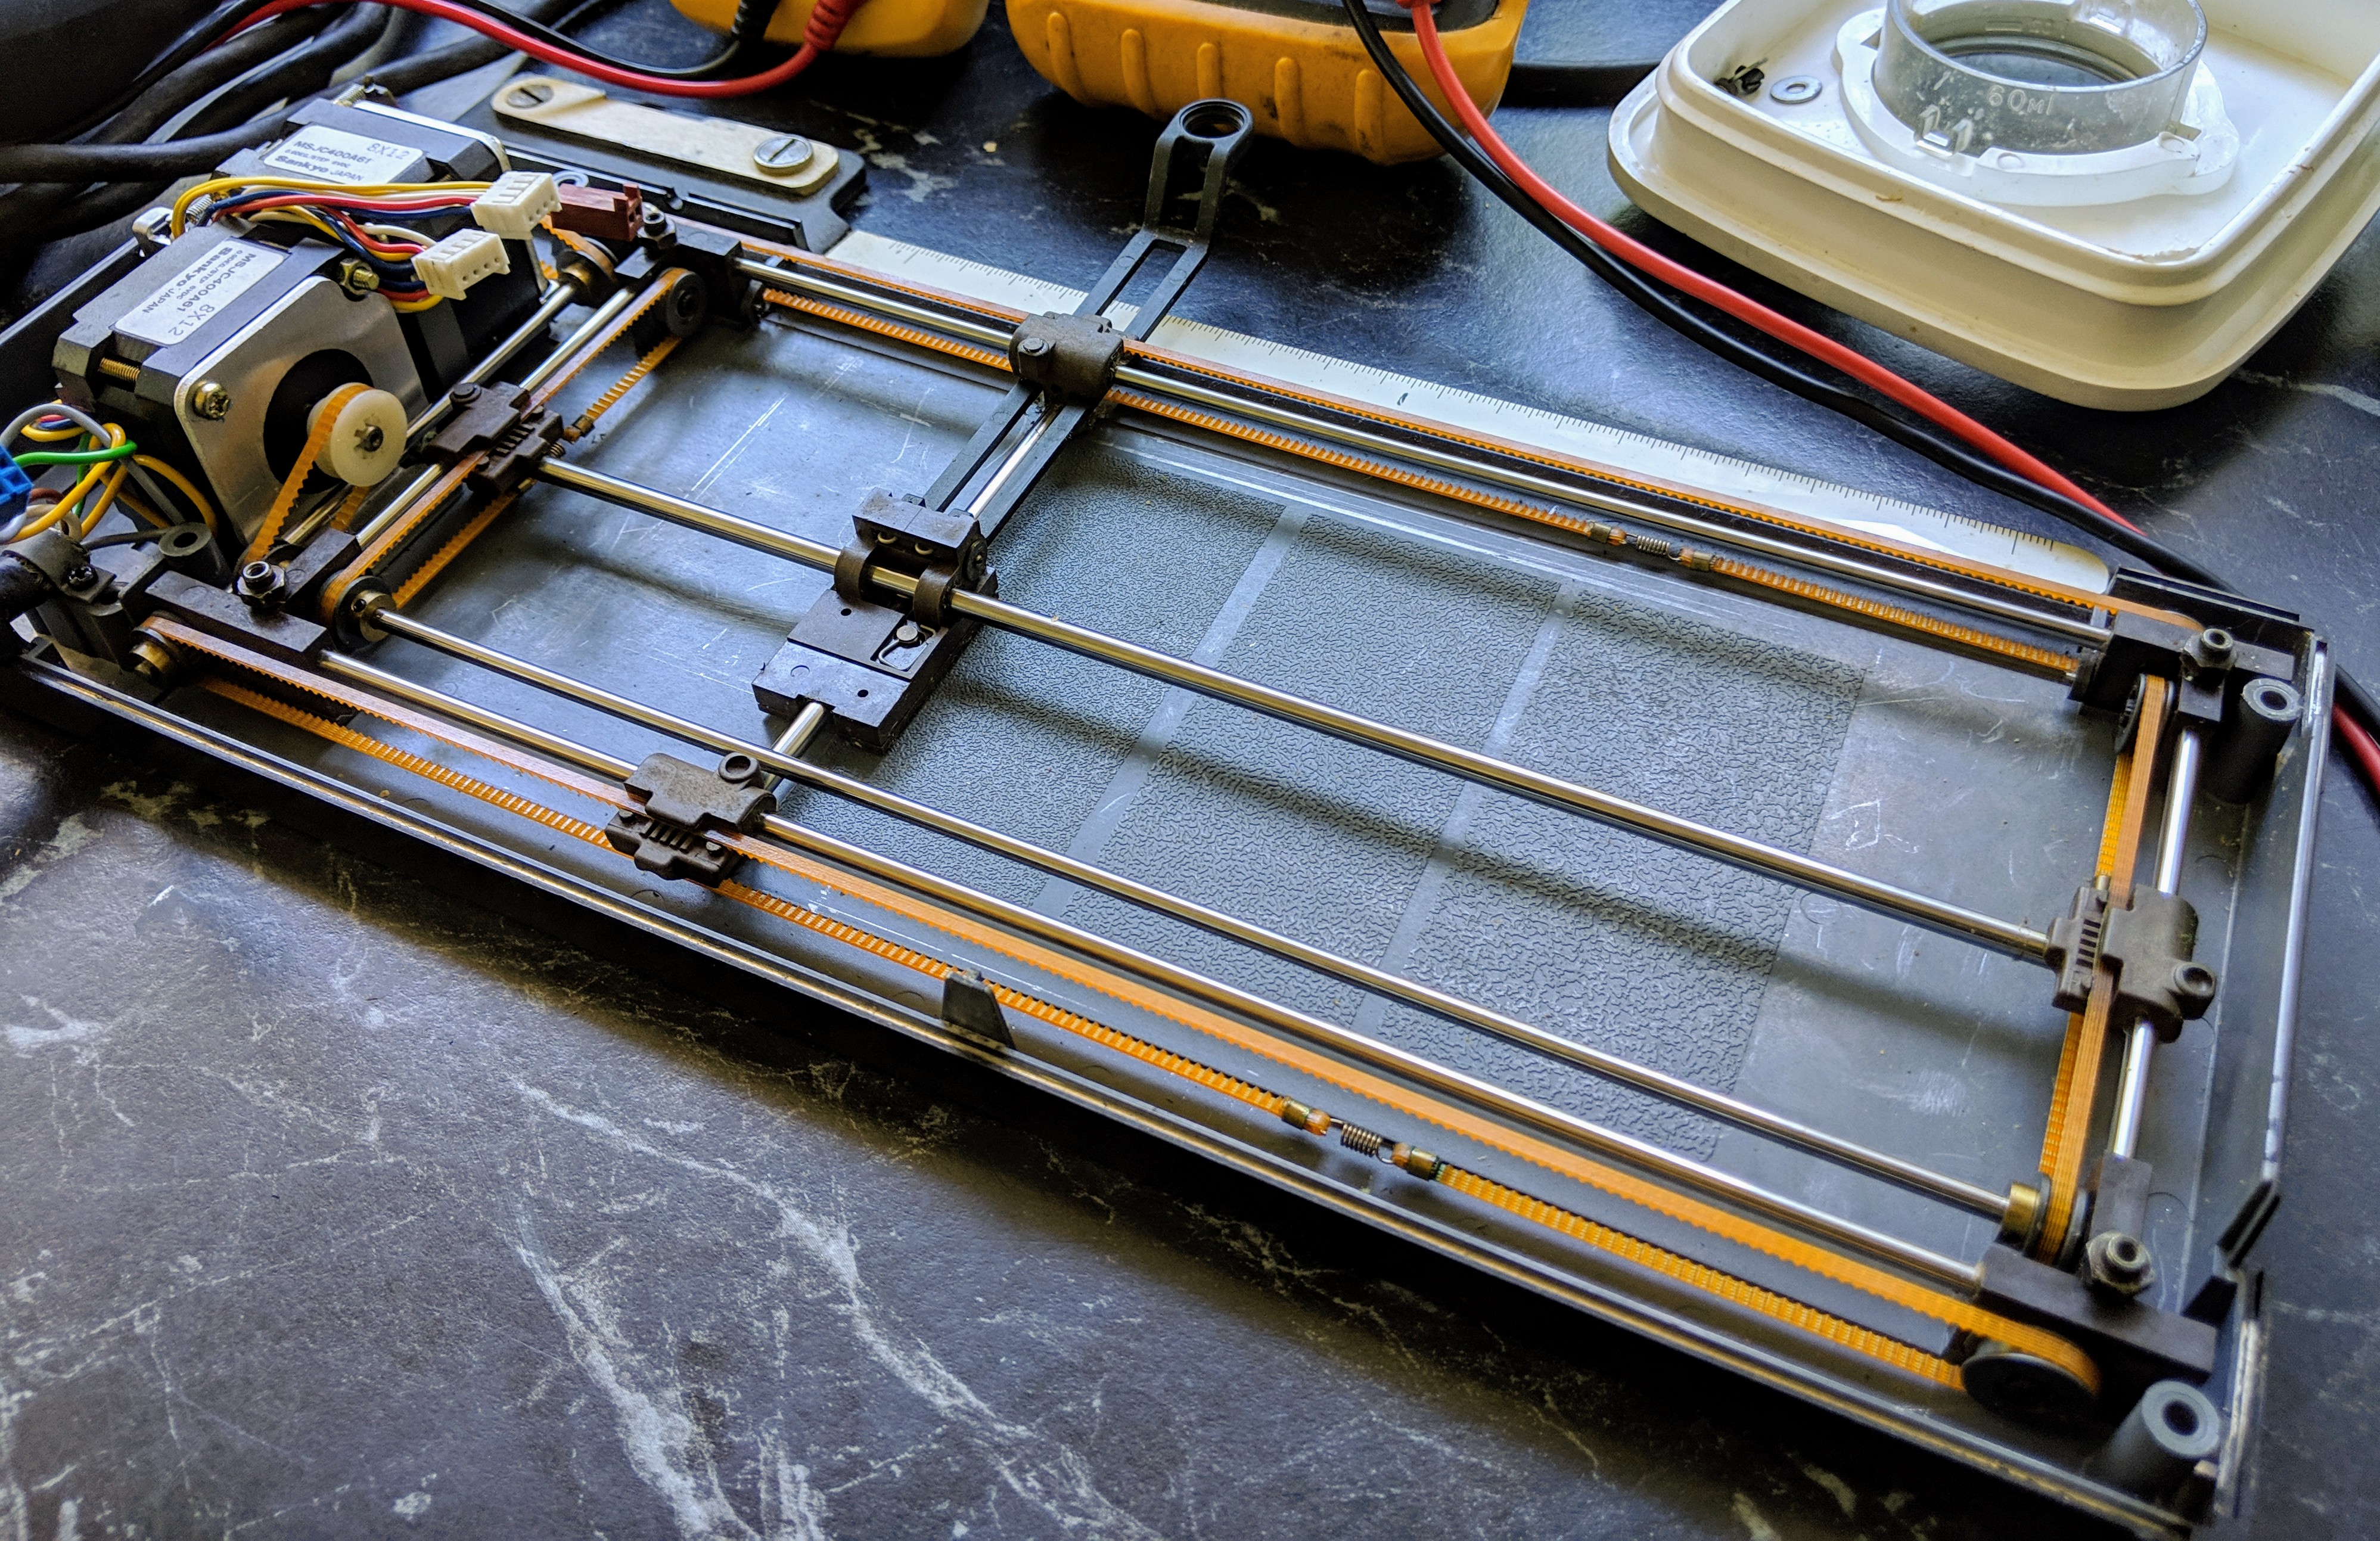
So Yes, It works, But what’s inside? 3 PCB’s, 2 steppers, 1 Solenoid and the motion system used by the Ultimaker 3D printers.
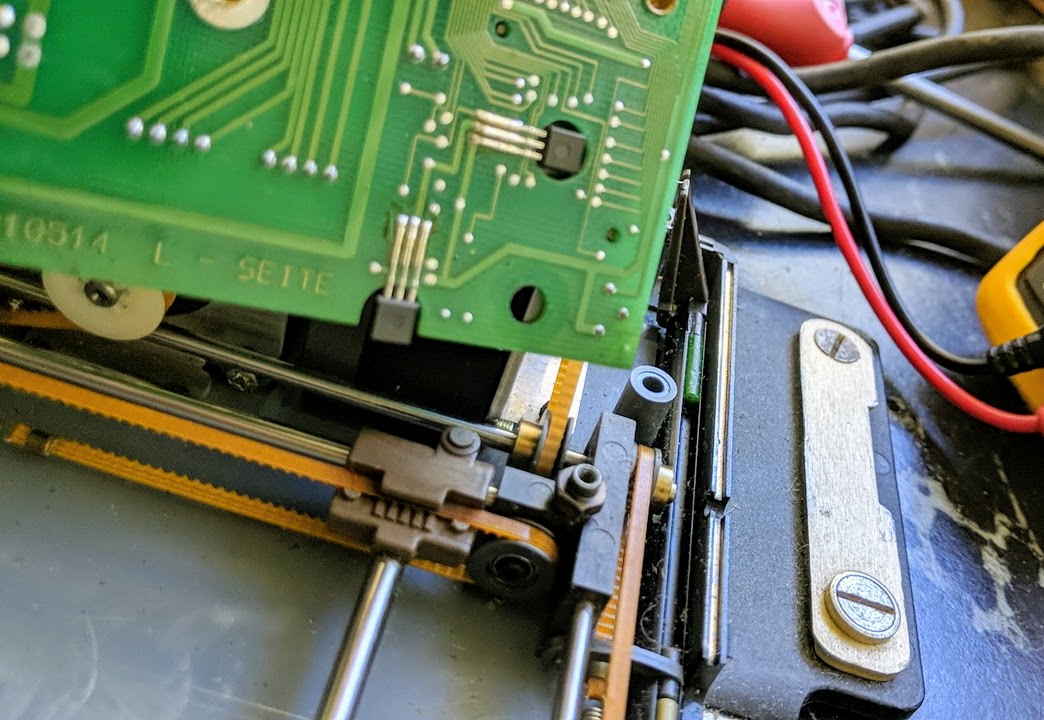
you can see one of the hall effect homing sensors in a cutout on the upper left of the main pcb.
Electronics wise there is a large pcb and two daughter boards, one for the lcd and the other has carbon tracks for the membrane keypad. The mainboard does everything including driving the steppers and solenoid.
I didn’t examine the electronics much as I will bypass all of them if i want to do anything non standard like art with it.
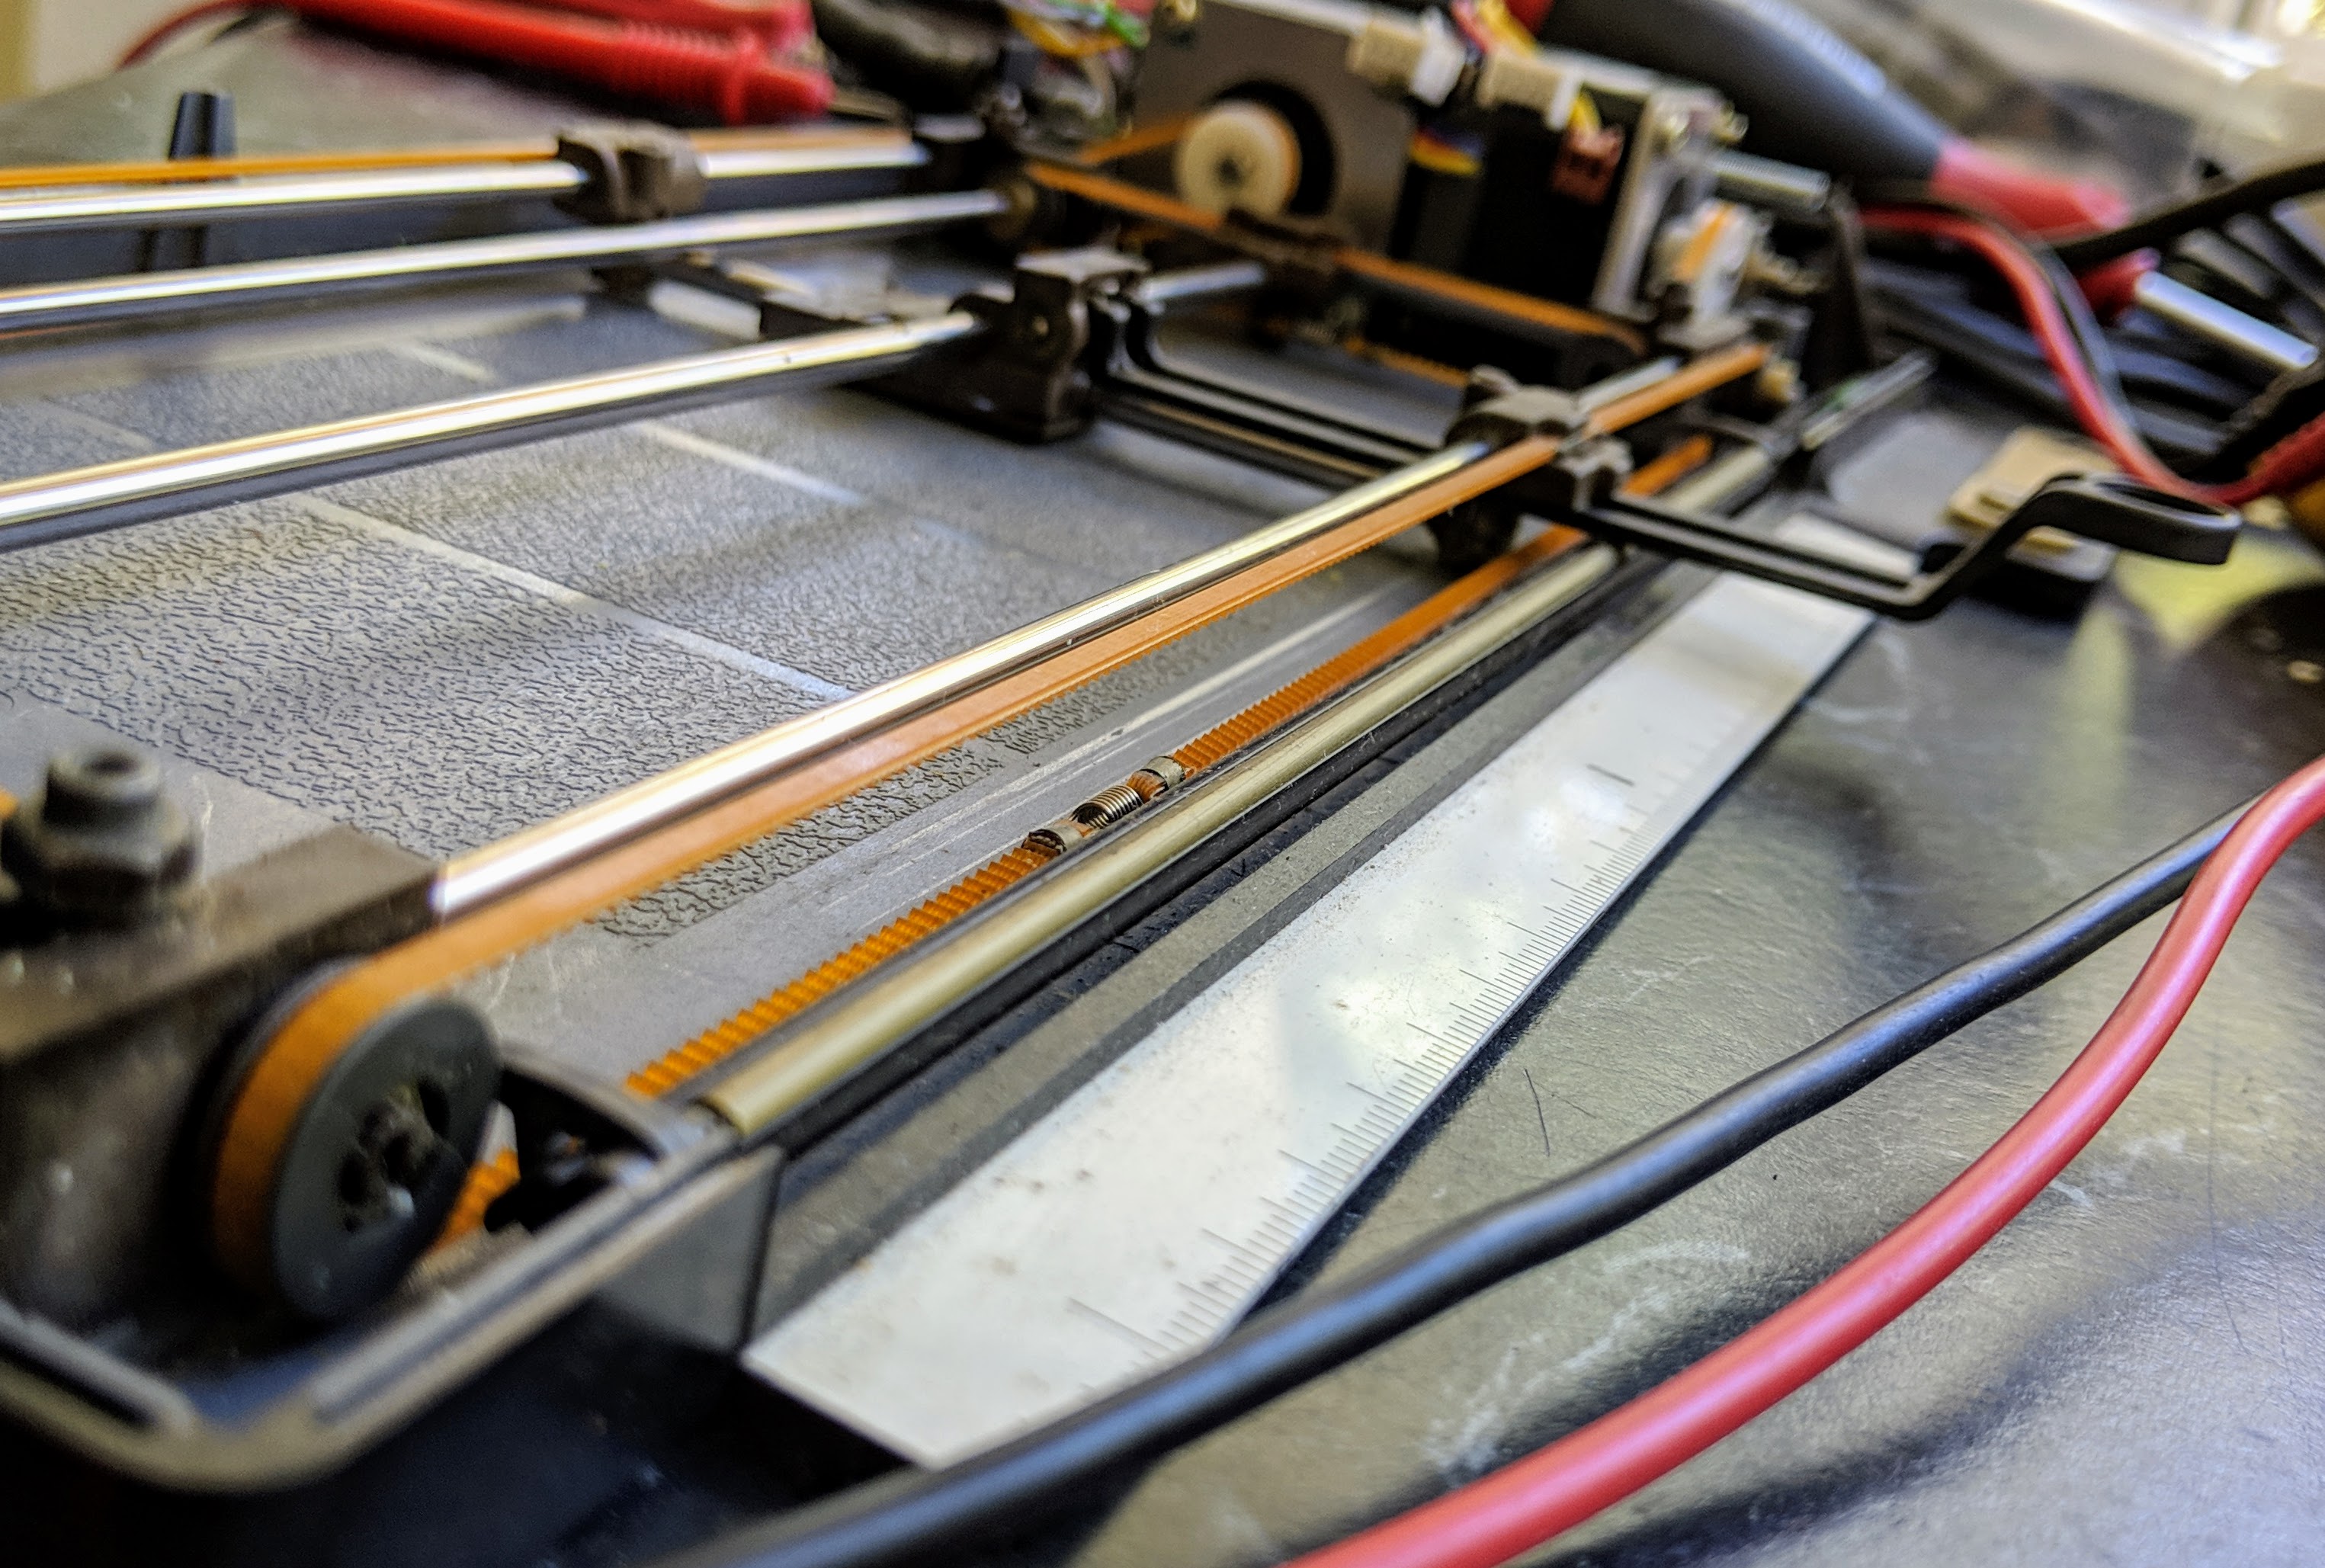
Very neatly packaged motion system under the mainboard.the underside of the mainboard shows the two hall effect sensors used to detect the position of the little round magnets mounted on in the brown plastic sliders of the x and y axes sliders.